Build Your Own APoS Tripod: Manfrotto Ranker Stand Modification Guide

Introduction
For a more full-bodied introduction to this topic please see previous post: Refinement of the APoS Survey Tripodor watch the Follow Up Video: WLPC_EU 2016 Ten Talk.
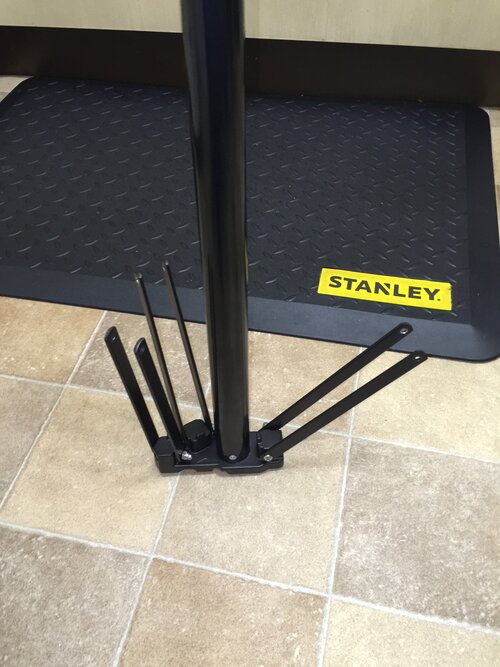
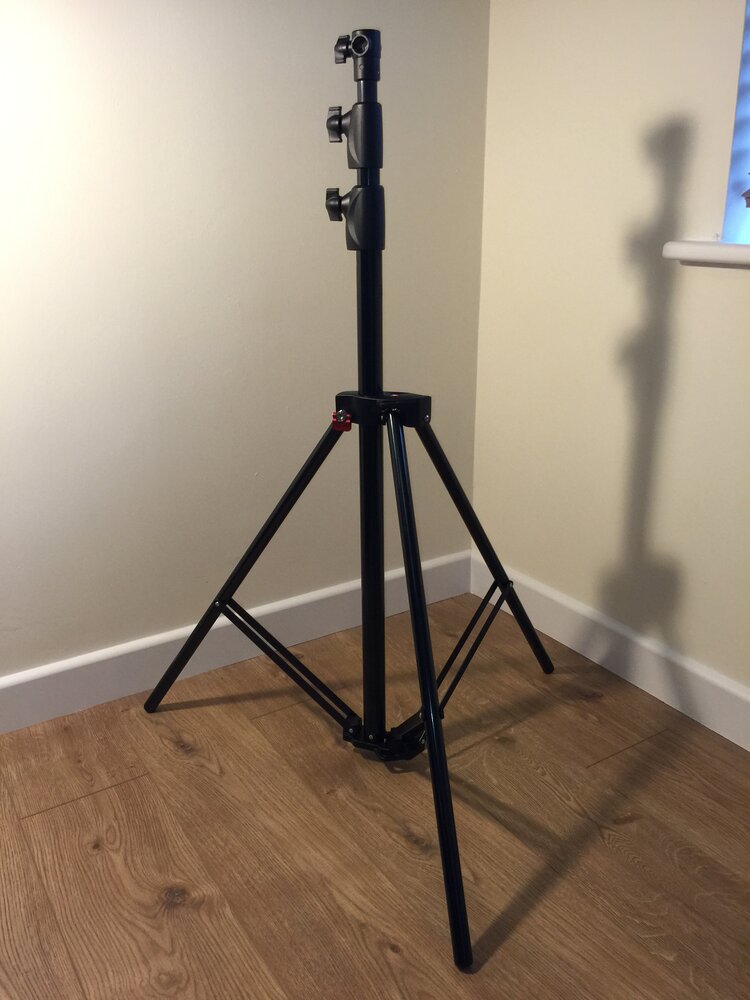
I felt confident that I could improve the Manfrotto Ranker stand for the purposes of "AP on a Stick" (APoS) work. There are two aspects that require attention; the footprint and the addition of wheels.
Please Note: Manfrotto studio wheels are intended for use with the legs of the tripod at a specific angle in order to maintain swivel and roll functionality. I measured this angle to be 40° from horizontal. In order to maintain this angle while shortening the legs, the spreader struts must also be shortened.
What You Will Need
Tools
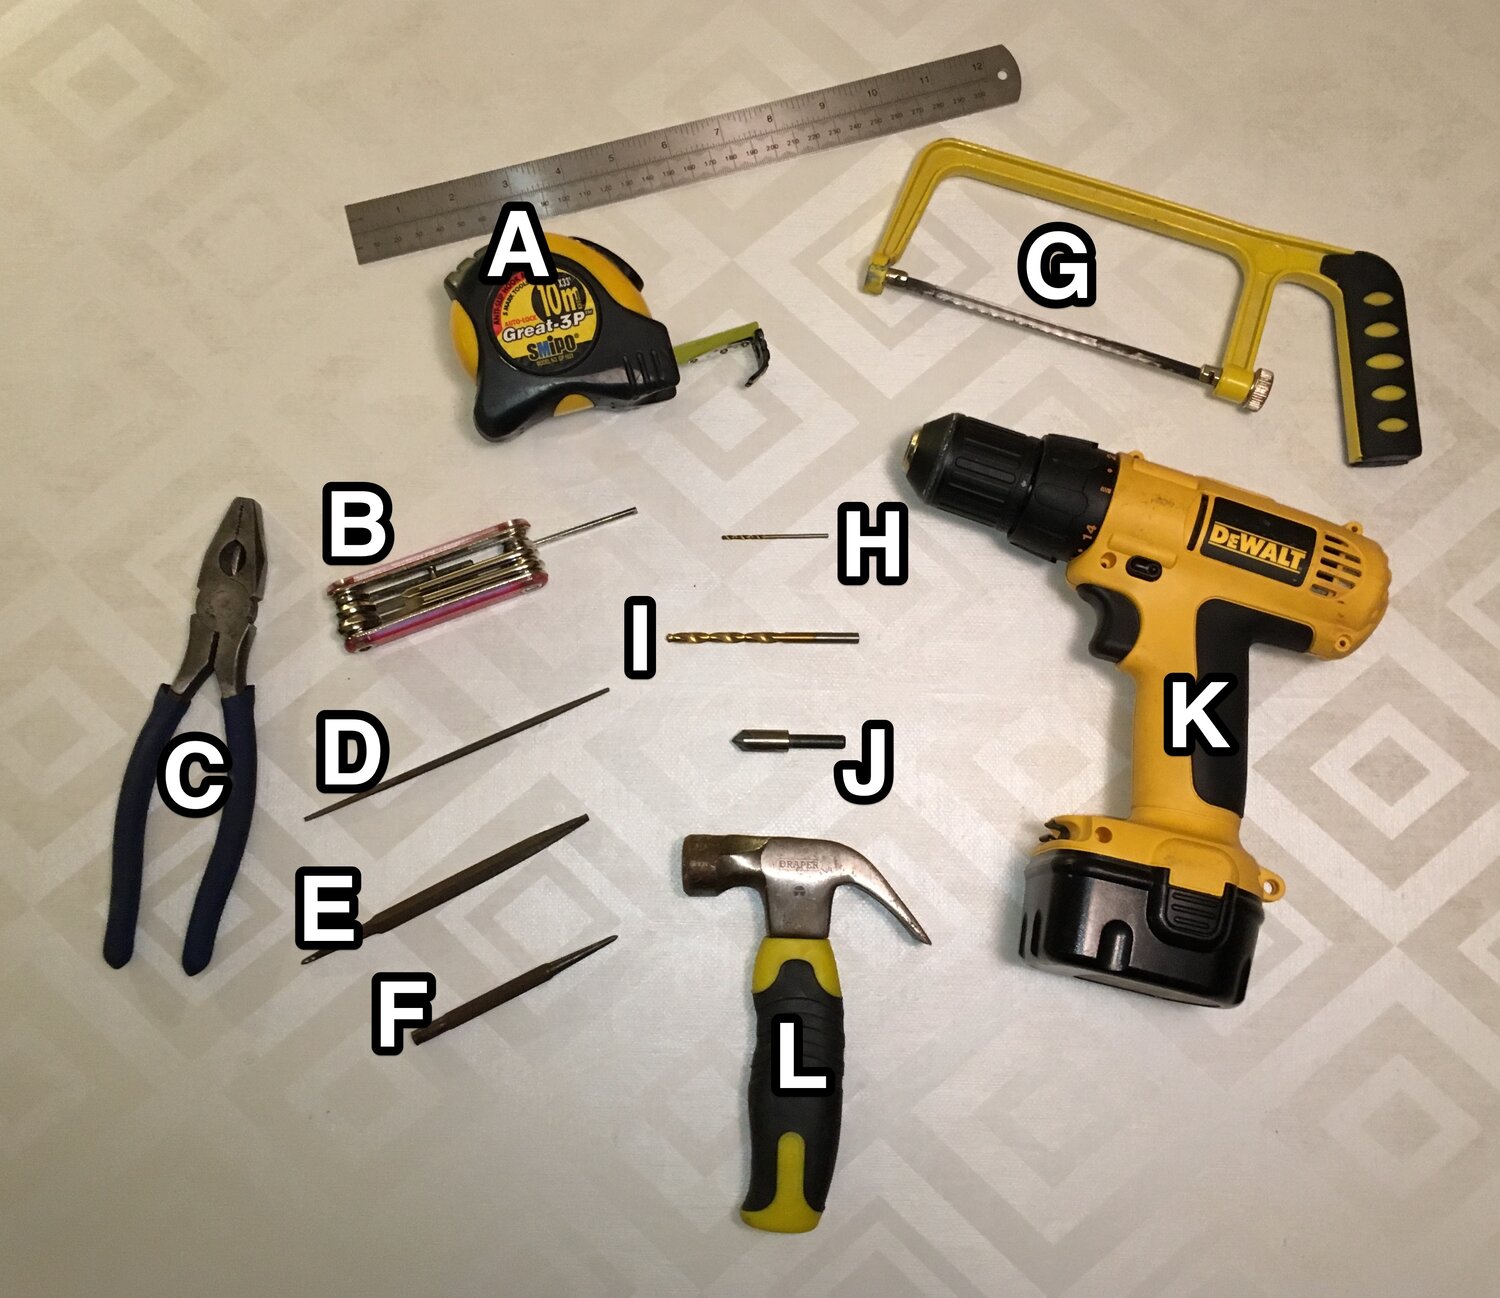
- (A) tape measure / (steel) rule
- (B) 3mm Allen key
- (C) pliers
- (D) circular file
- (E) flat file
- (F) centre punch
- (G) (junior) hacksaw
- (H) 2mm drill bit
- (I) 5mm drill bit
- (J) countersink
- (K) drill
- (L) hammer
Materials

- (M) 8x [ M5 x 40mm ] dome head bolt
- (N) 8x [ M5 ] dome nut
- (P) 12x [ M5 ] nylon washer
- 1x Manfrotto Ranker Stand
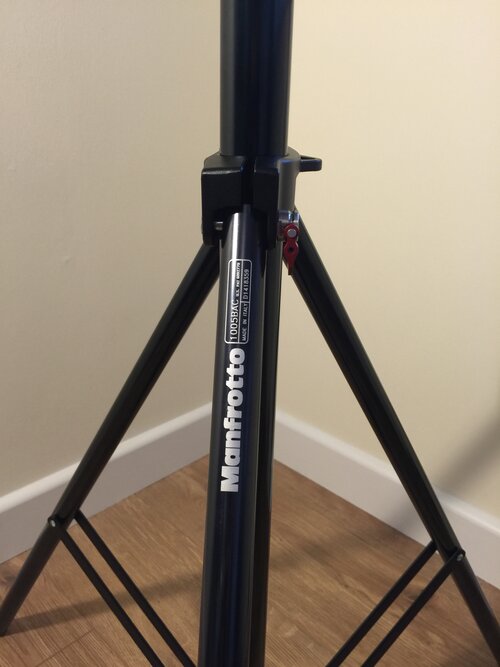
Ranker Stand Orientation
For the purposes of this blog post.
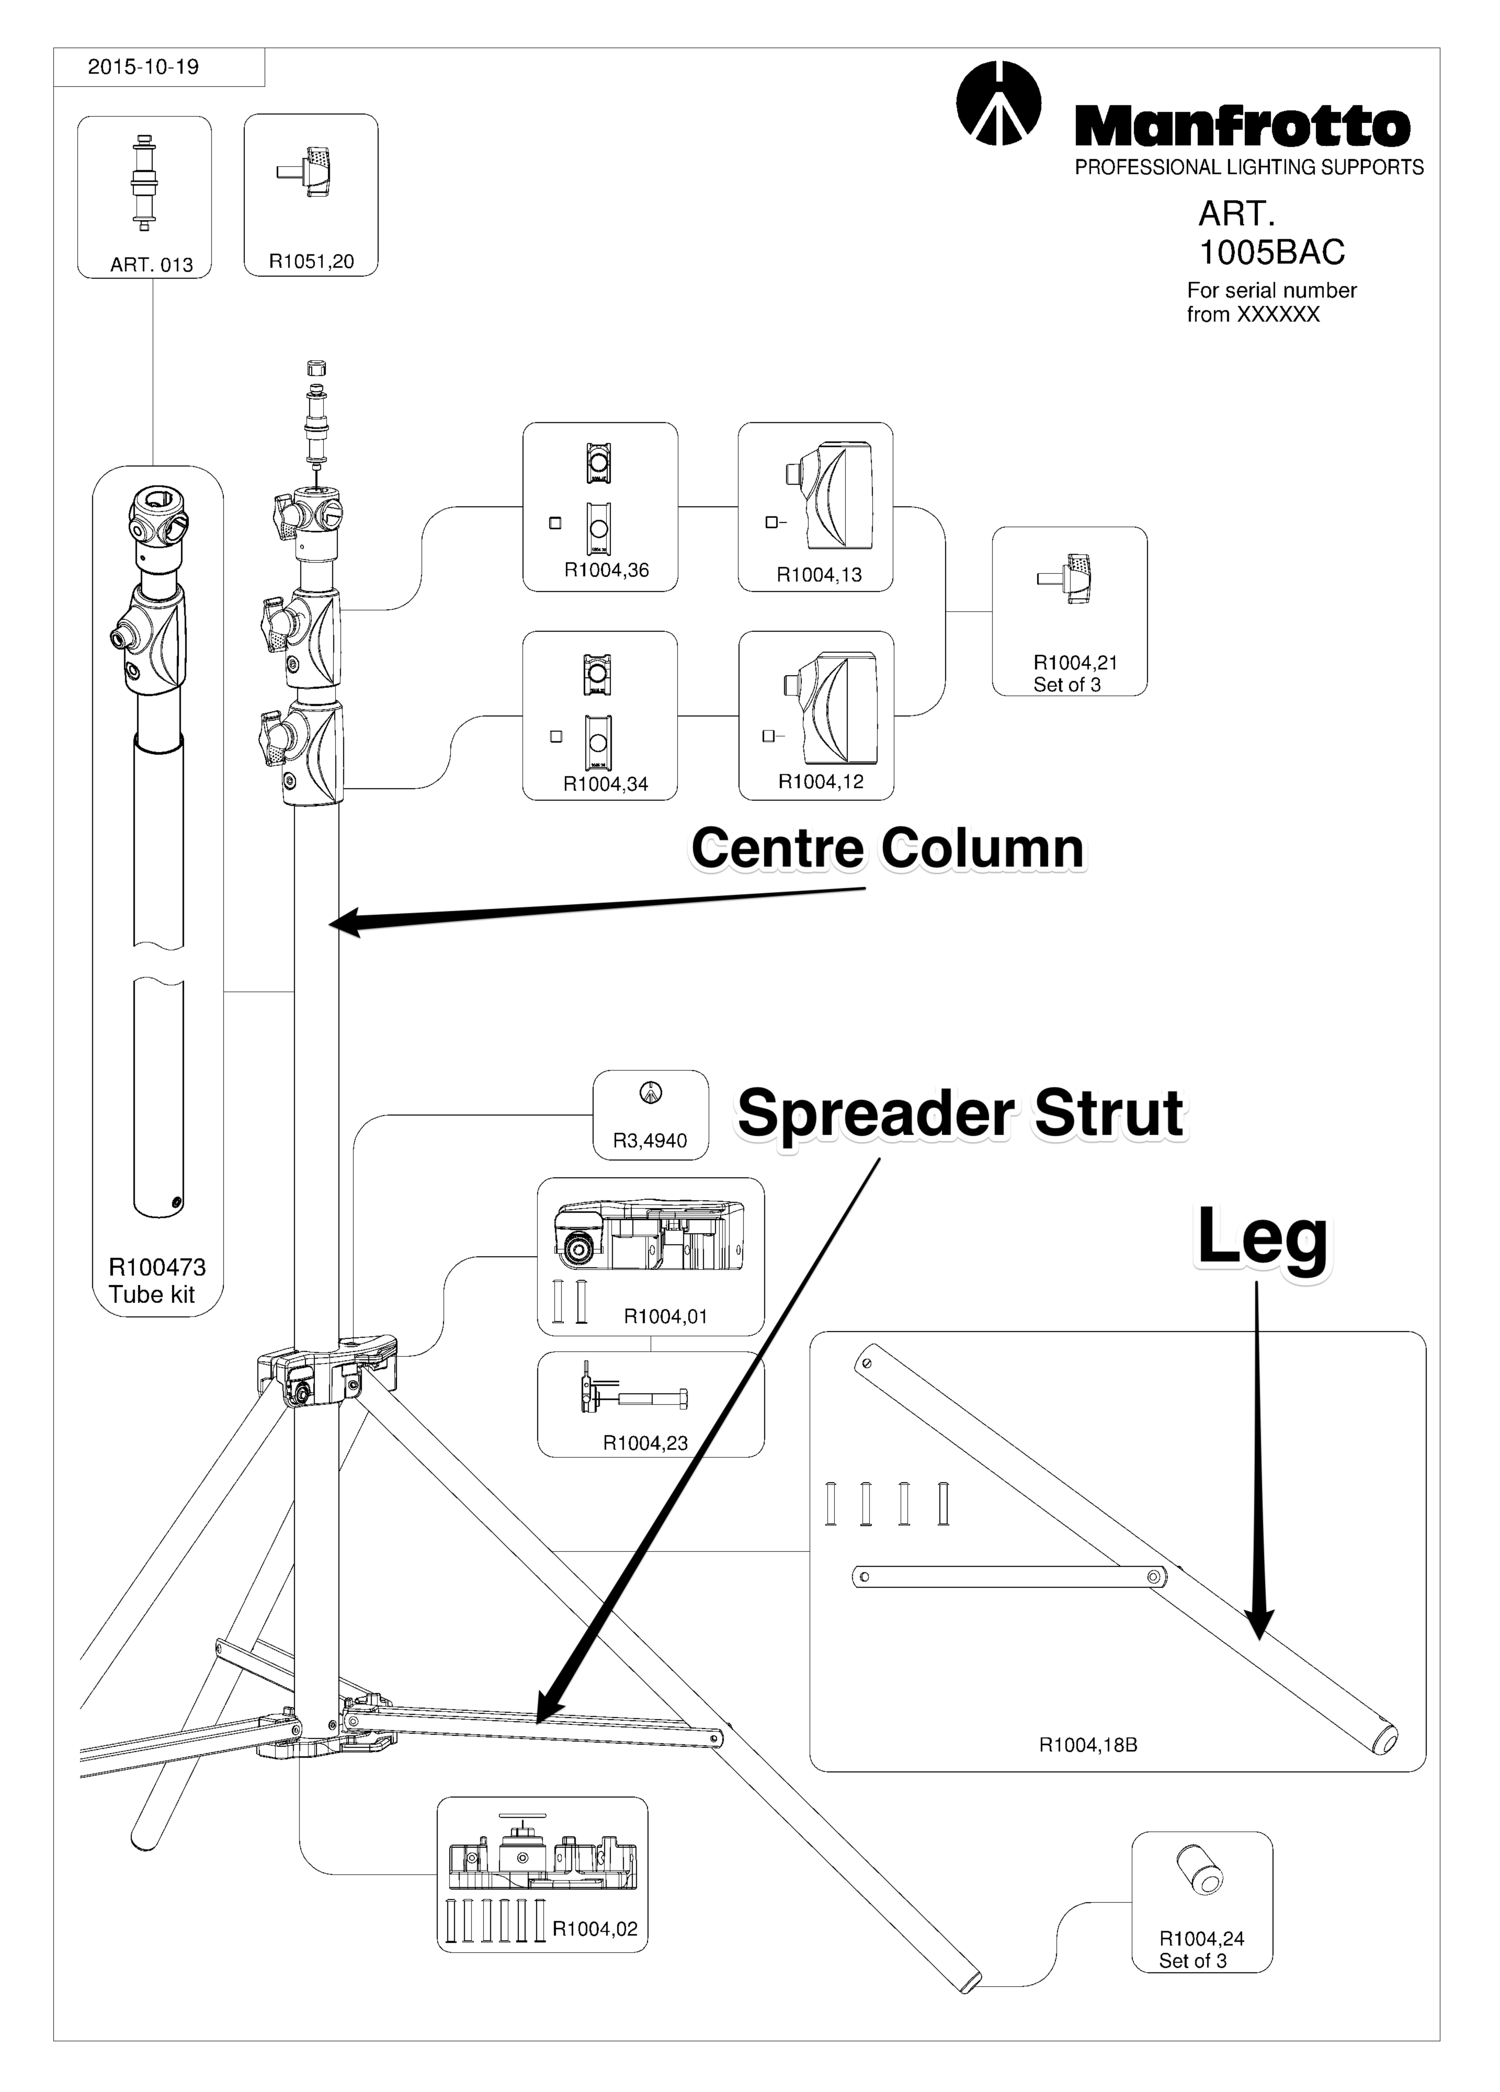
The original Manfrotto artwork document may be found here
Rivets

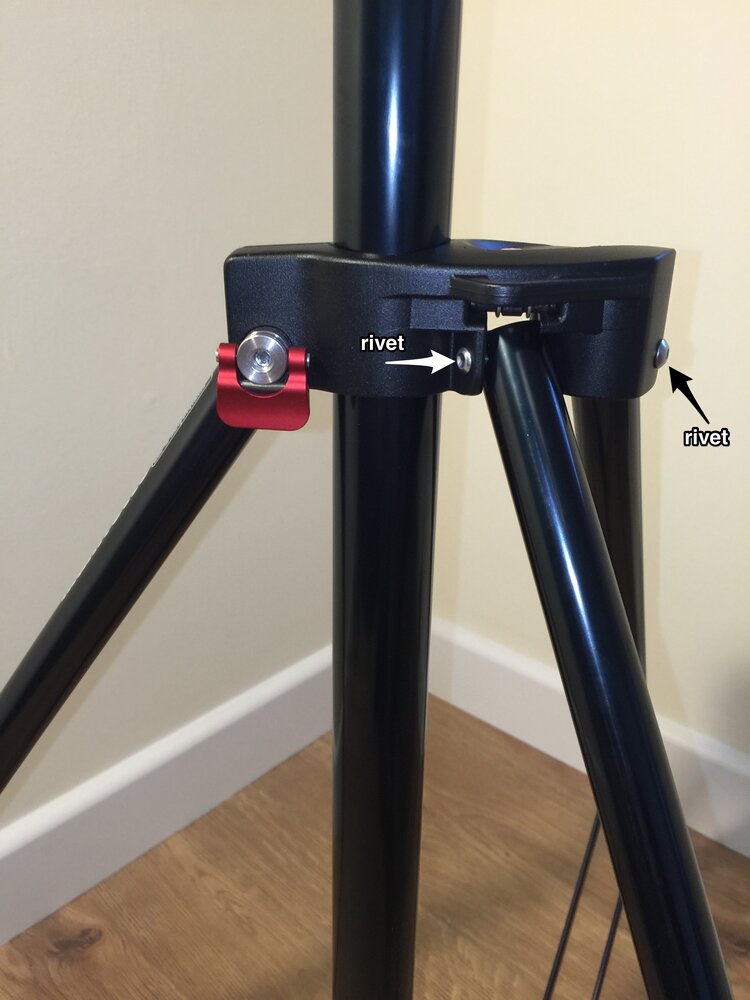
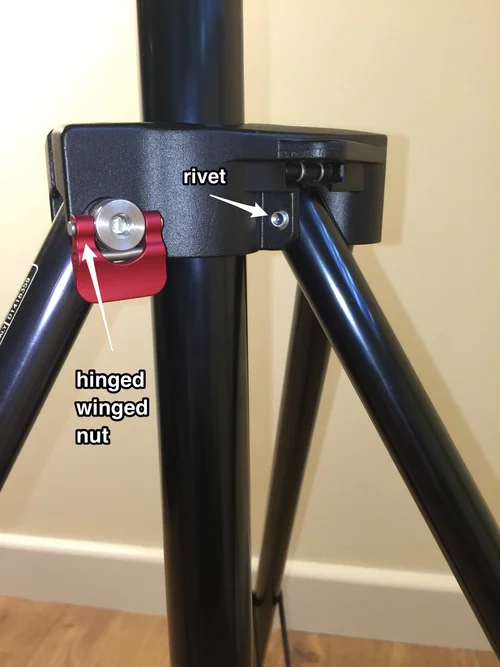
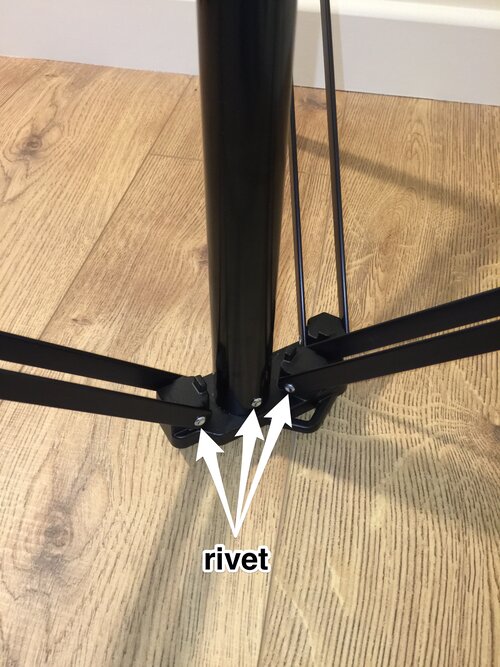
Joints of the tripod secured by rivet
Removing the rivets

I used a pair of pliers to prevent the rivet from spinning while drilling it out from the opposite side. For this I used a battery powered DeWalt hand drill with 5mm.
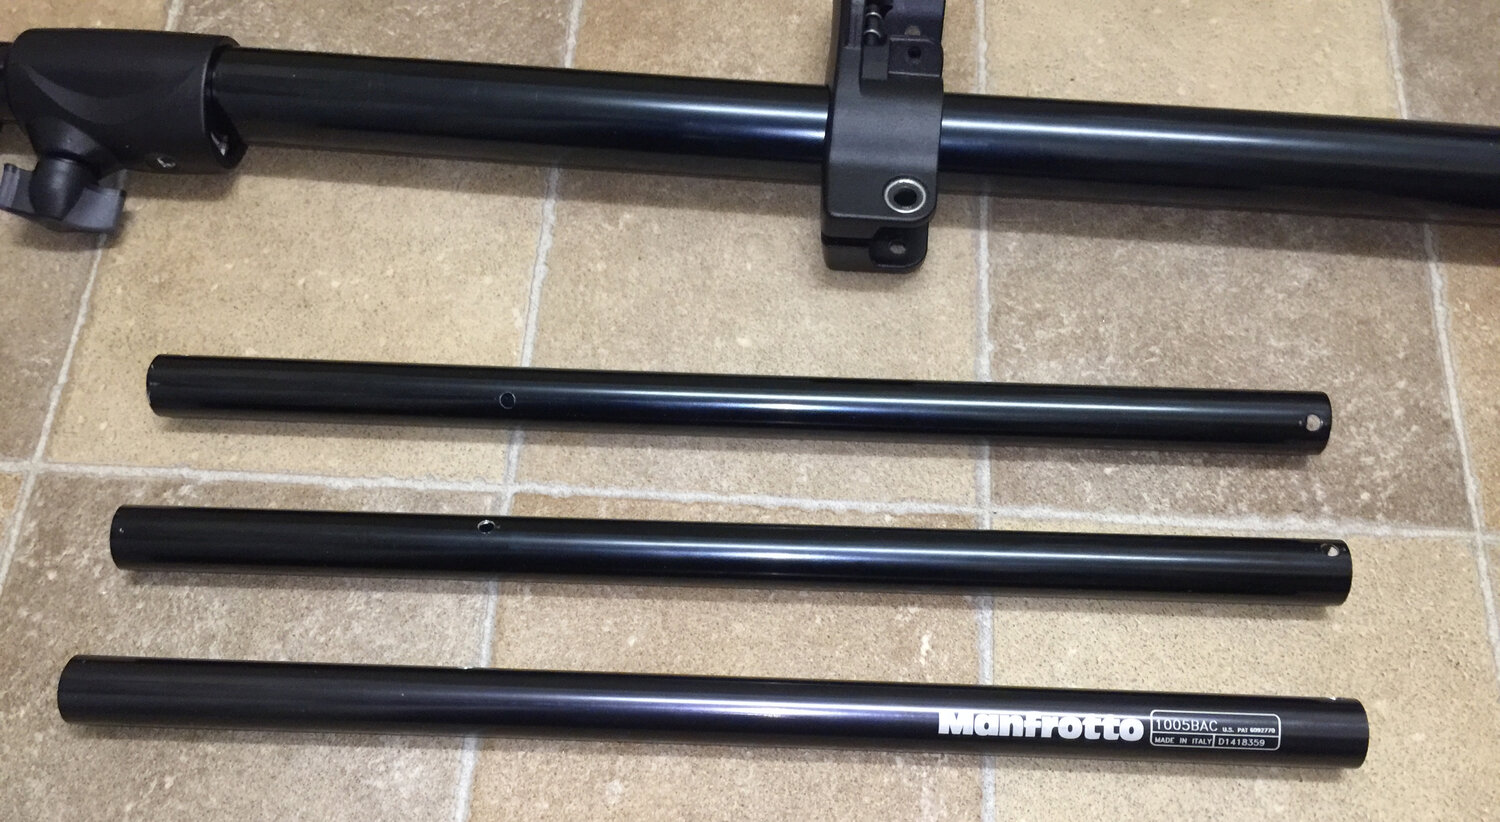
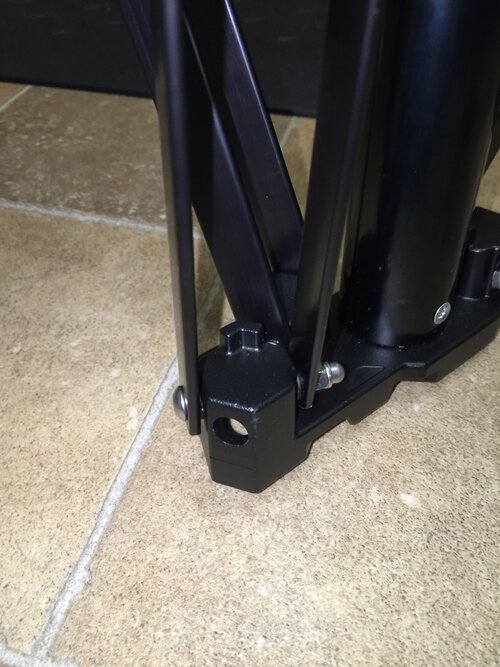
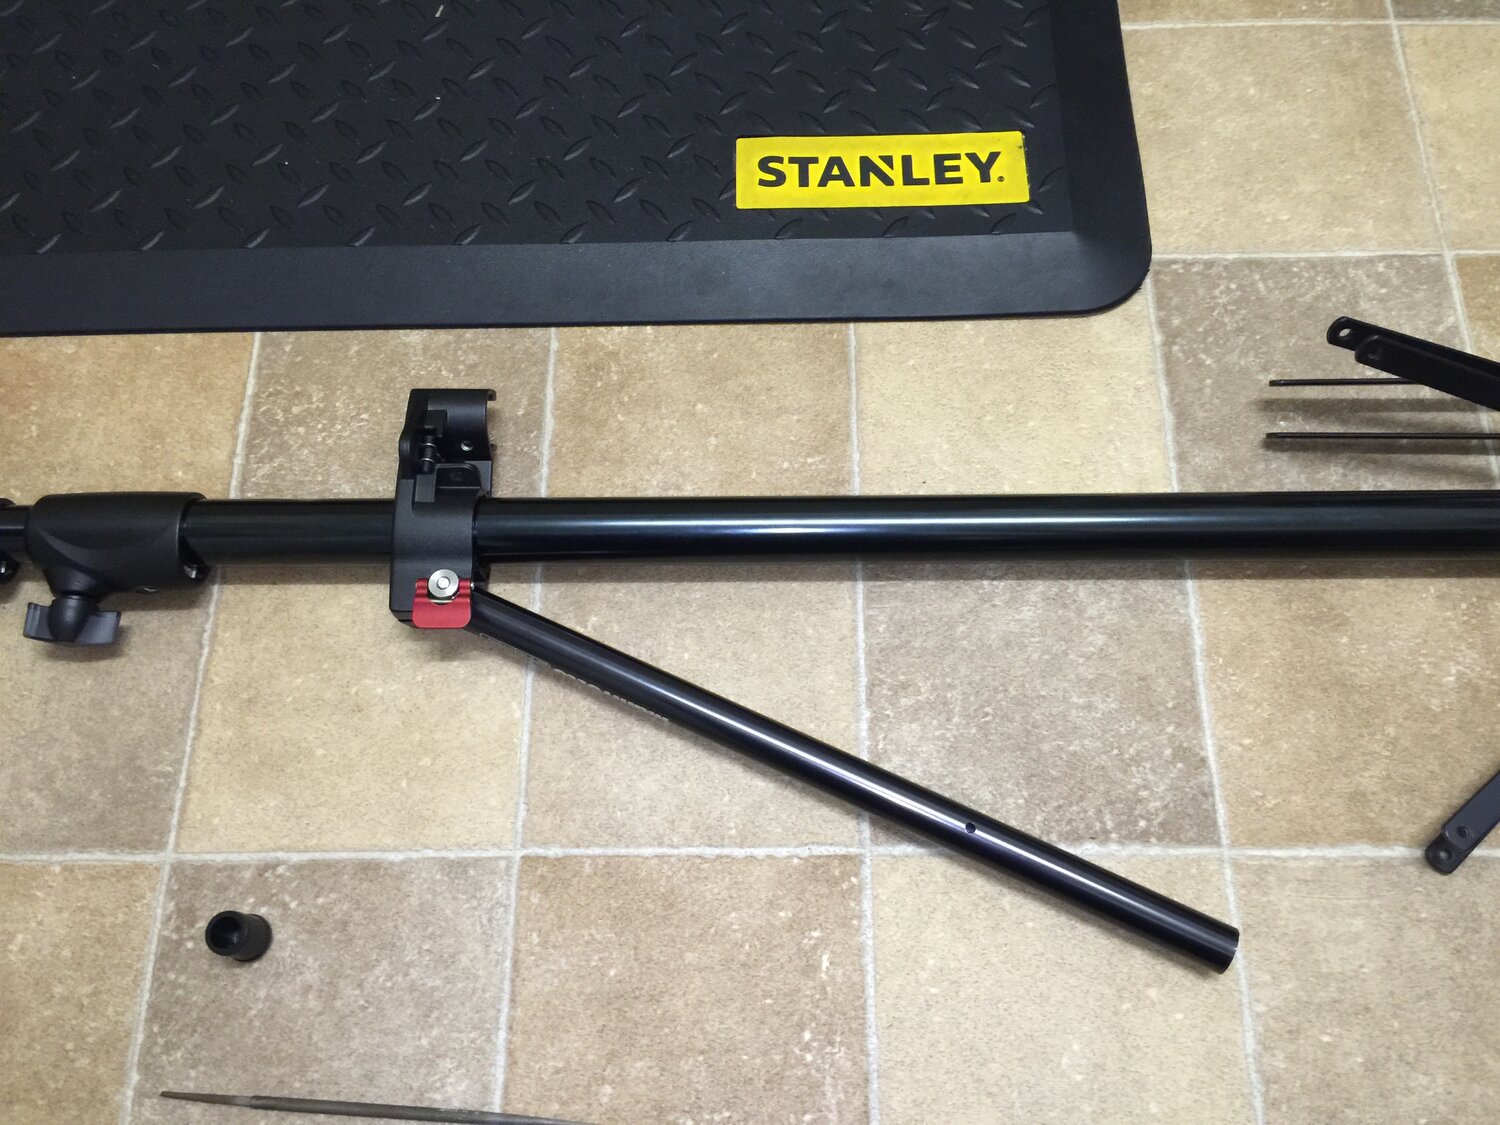
Shortening & drilling the Spreader Struts
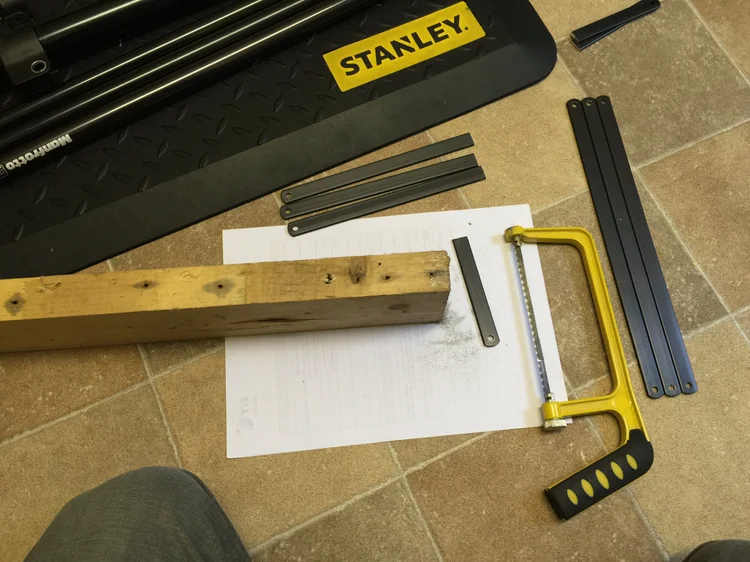
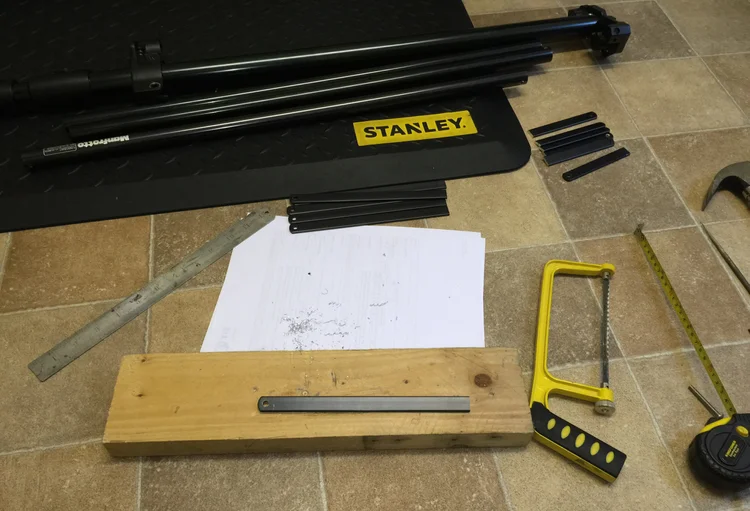
Once the legs and spreader struts were detached from the centre column, the spreader struts were cut one at a time down to a length of 200mm.
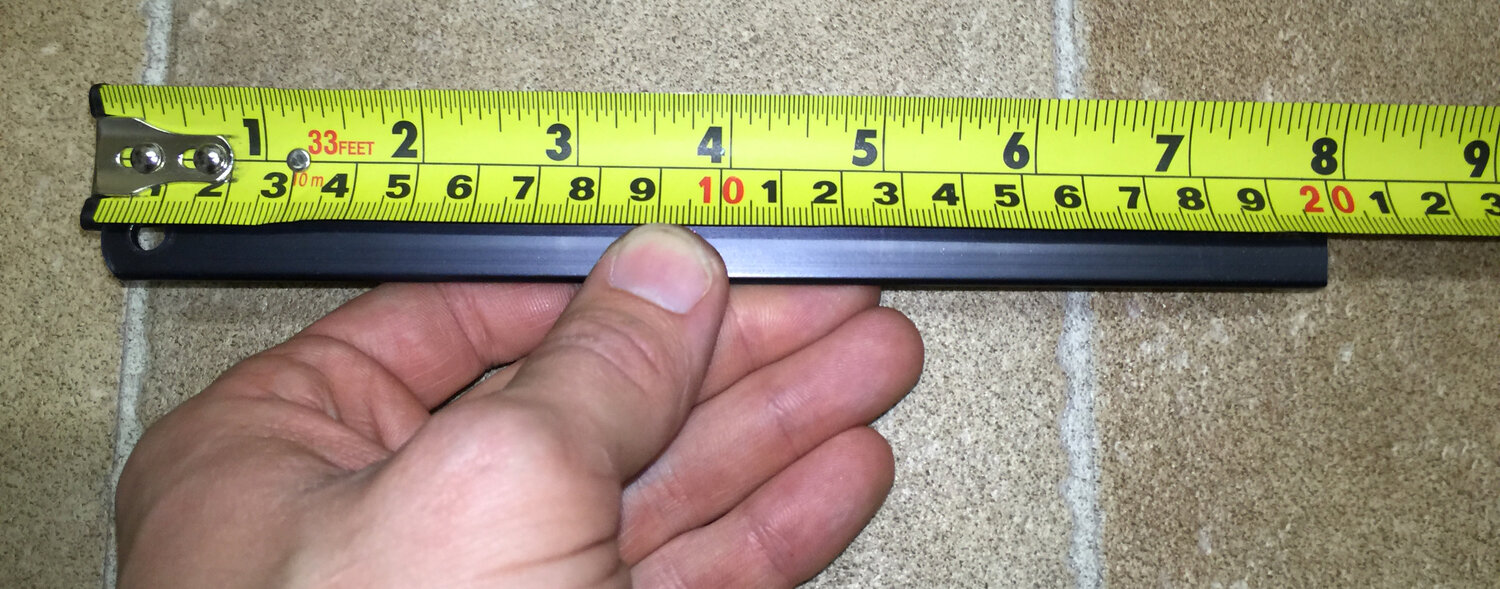
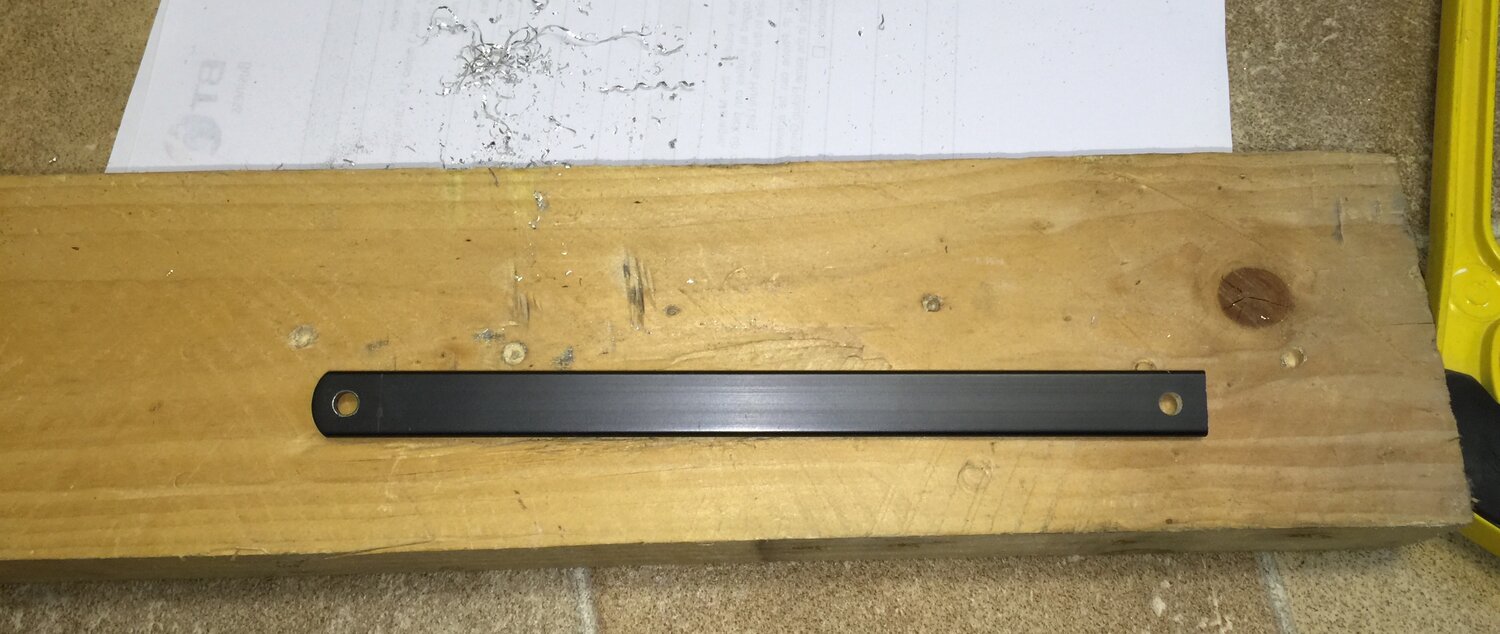
spreader strut shortened to 200mm
Using one of the other spreader struts with a pre-drilled hole as a template I marked the precise location for a replacement hole with a pencil. I used a centre punch to score the centre of the marked circle with the spreader strut resting on a piece of wood. Initially I drilled the hole with a 2mm bit, followed by a 5mm bit and then smoothed the edges using a countersink.
shortened spreader strut, replacement hole drilled
I marked the curvature from one of the pre-cut edges onto the freshly cut spreader strut with a pencil, the sharp corners were removed with a hacksaw, the edges smoothed with a file.
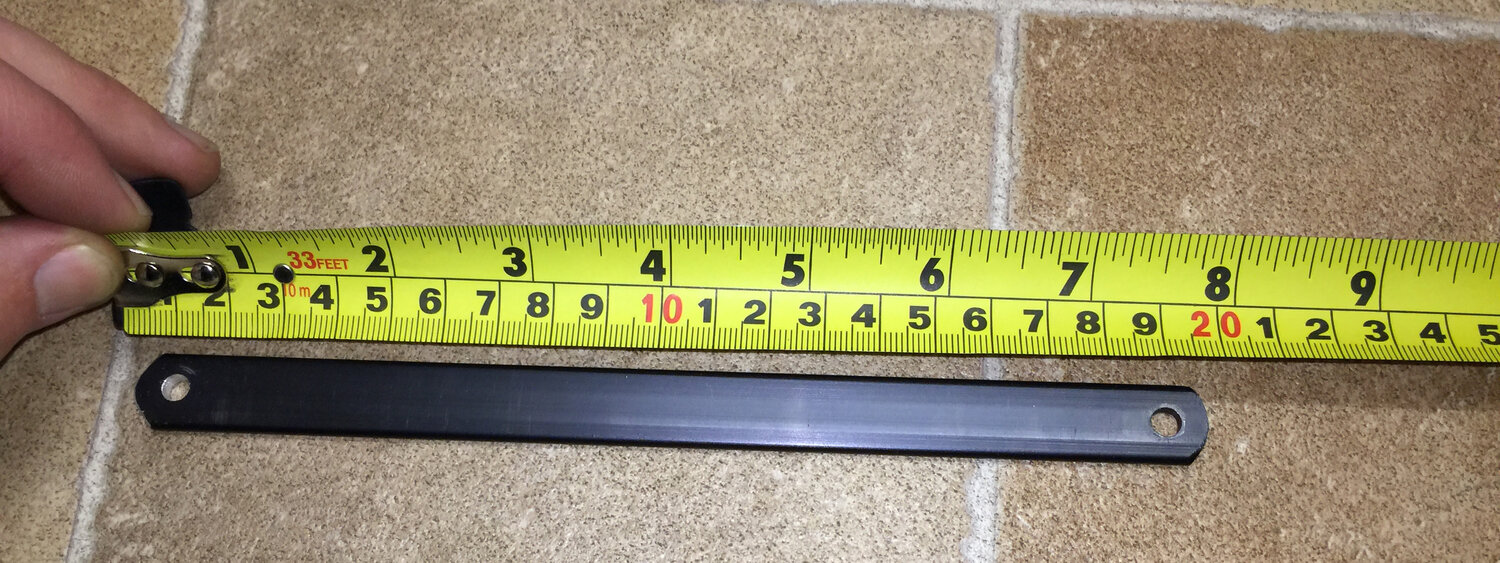
completed spreader strut, trimmed and drilled
all six spreader struts trimmed and drilled
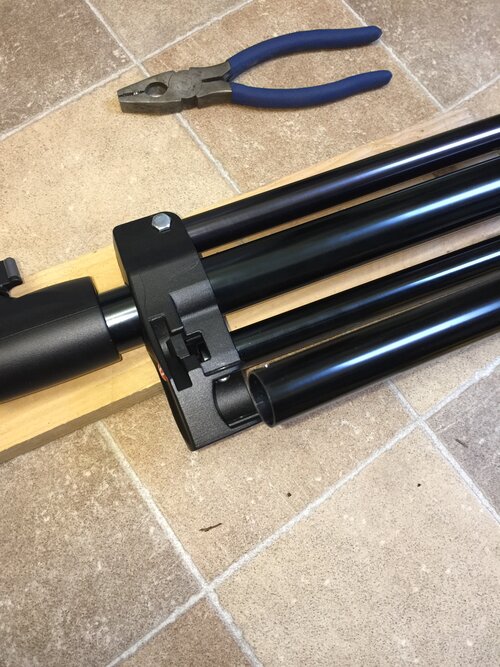
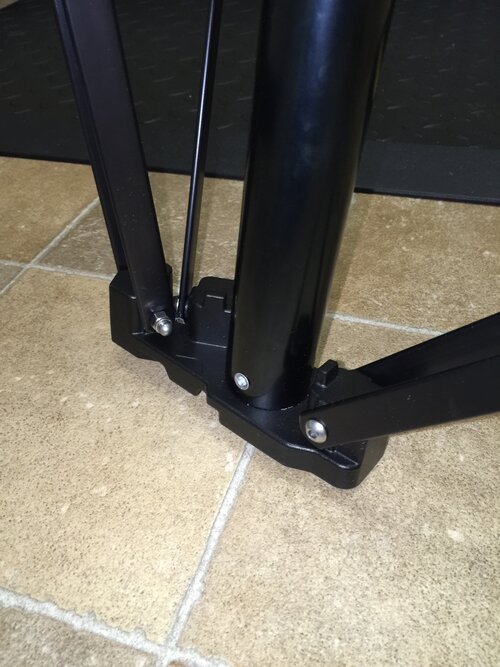
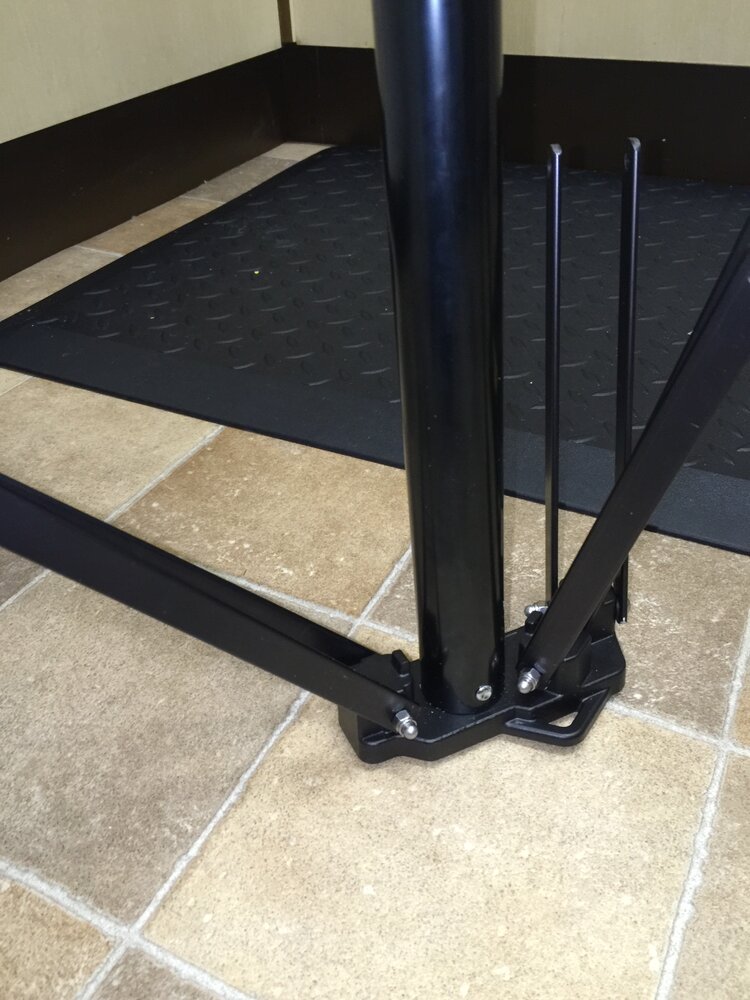
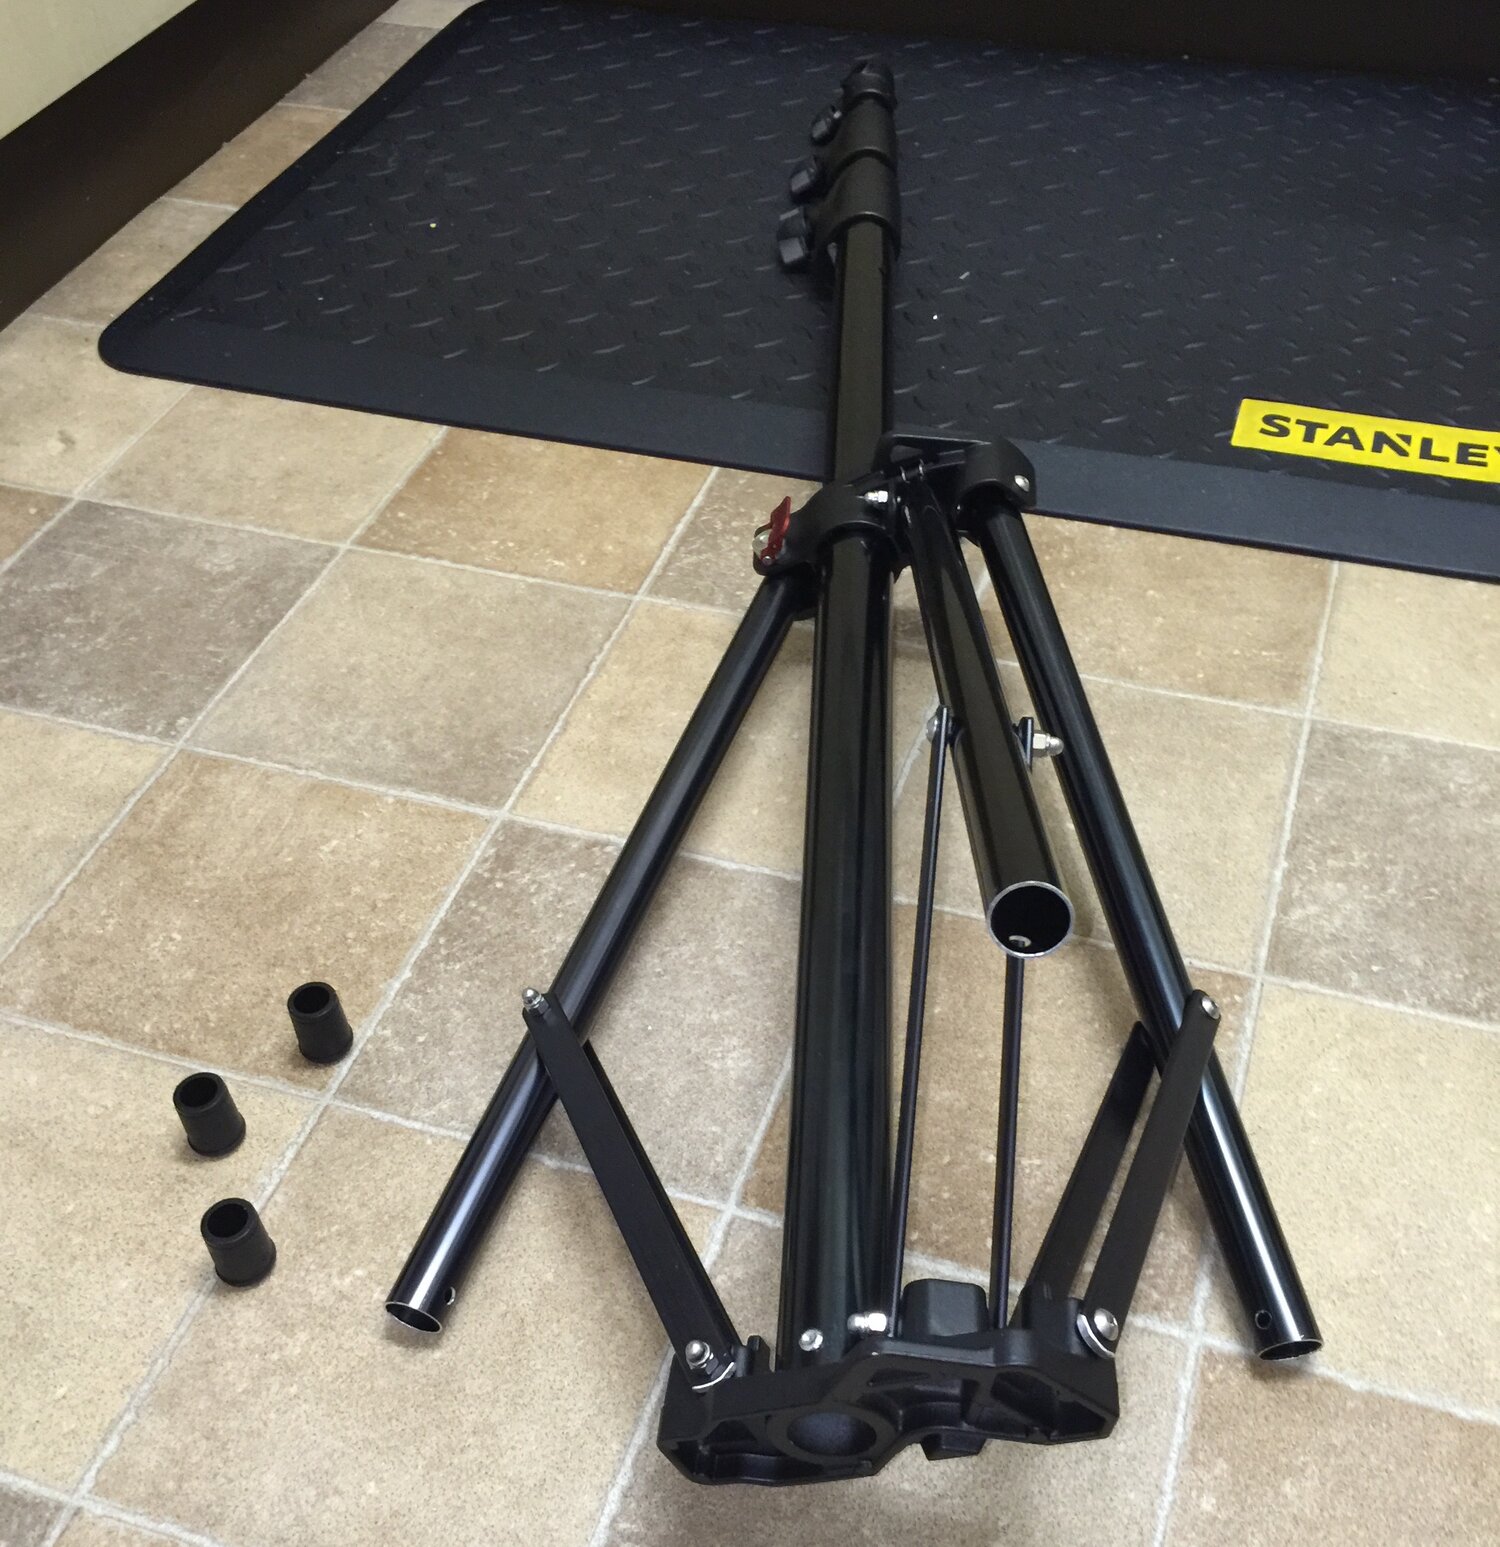
Shortening & drilling the Legs
tripod leg, pre-modification
Before modifying the tripod legs, pay attention to the placement of the pre-existing holes. It is important to understand the role and relative location of each hole so that once the spreader strut is shortened, replacement holes may be added in the correct relative location.
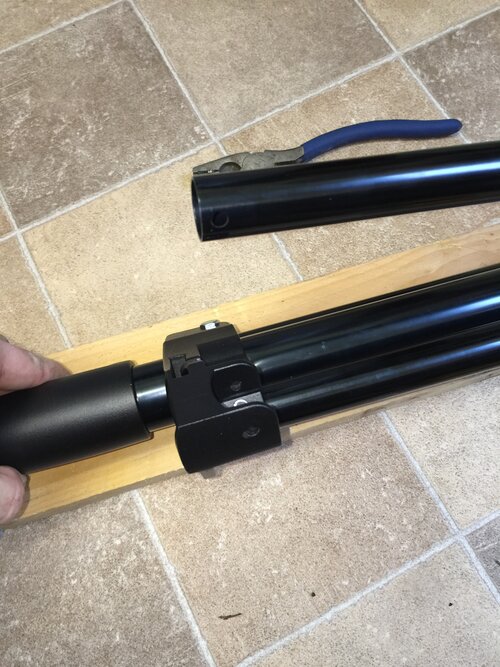
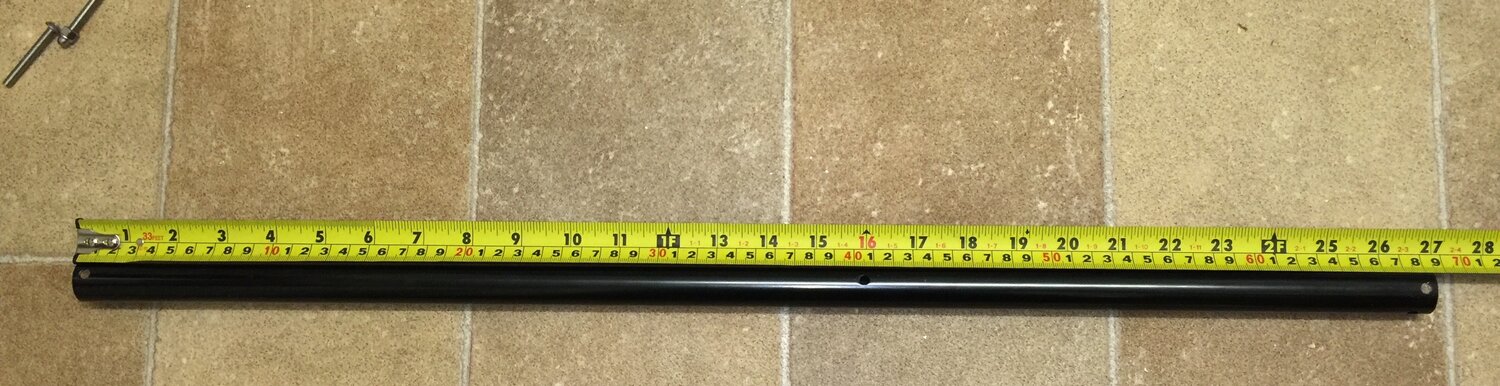
I reduced the leg length to 400mm with the hacksaw
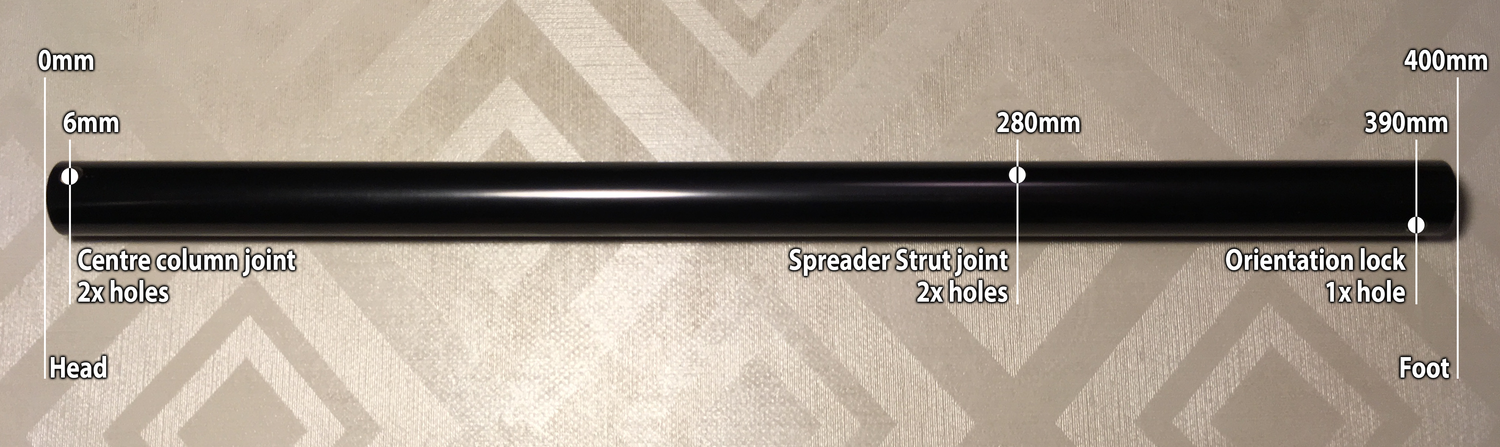
tripod leg post-modification, annotated
2x holes at 6mm - joint with centre column
2x holes at 280mm - joint with spreader struts
1x hole at 390mm - wheel orientation lock
3x legs, post-modification
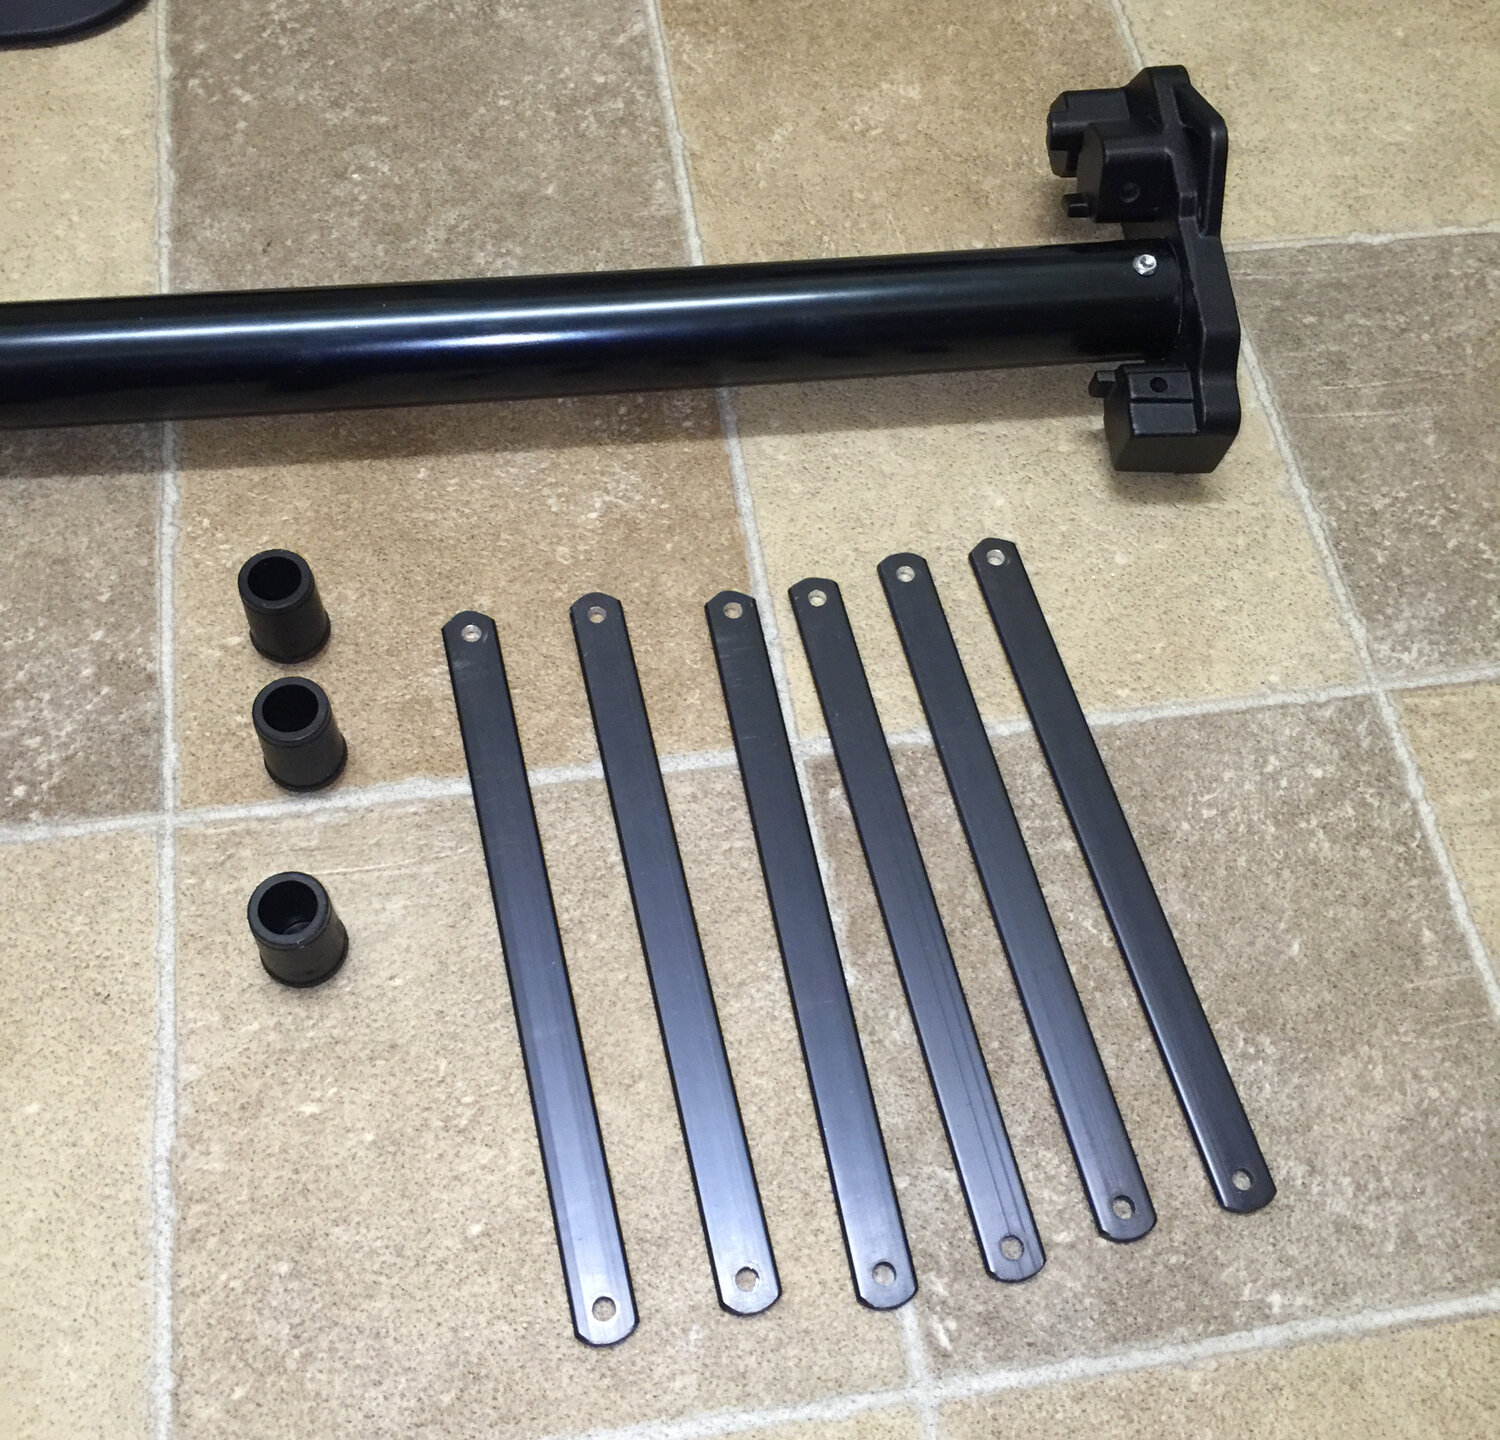
All of the Pieces
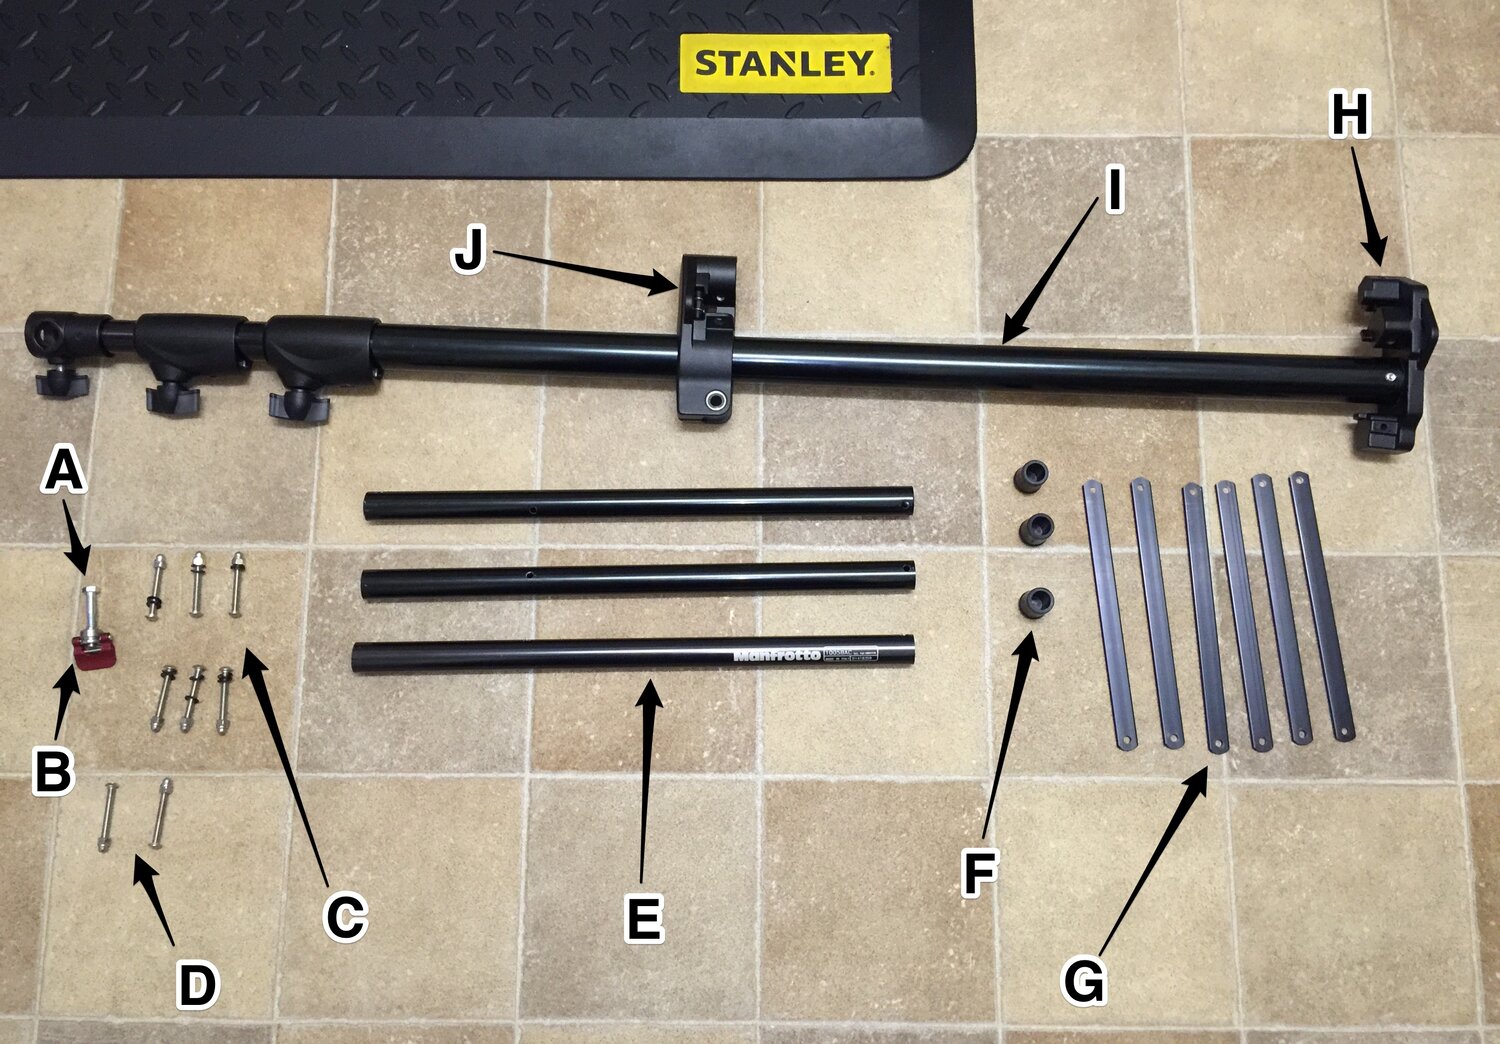
Here you can see:
- (A) 1x threaded hex bolt
- (B) 1x hinged winged nut
- (C) 6x [ M5 x 40mm ] dome head bolt
- (C) 6x [ M5 ] dome nut
- (C) 12x [ M5 ] nylon washer
- (D) 2x [ M5 x 40mm ] dome head bolt
- (D) 2x [ M5 ] dome nut
- (E) 3x shortened tripod leg
- (F) 3x rubber foot cap
- (G) 6x shortened spreader strut
- (H) centre column base
- (I) centre column
- (J) sliding collar
Assembly
First attach the spreader struts to the centre column base. Place a plastic washer on the inside of each spreader strut.
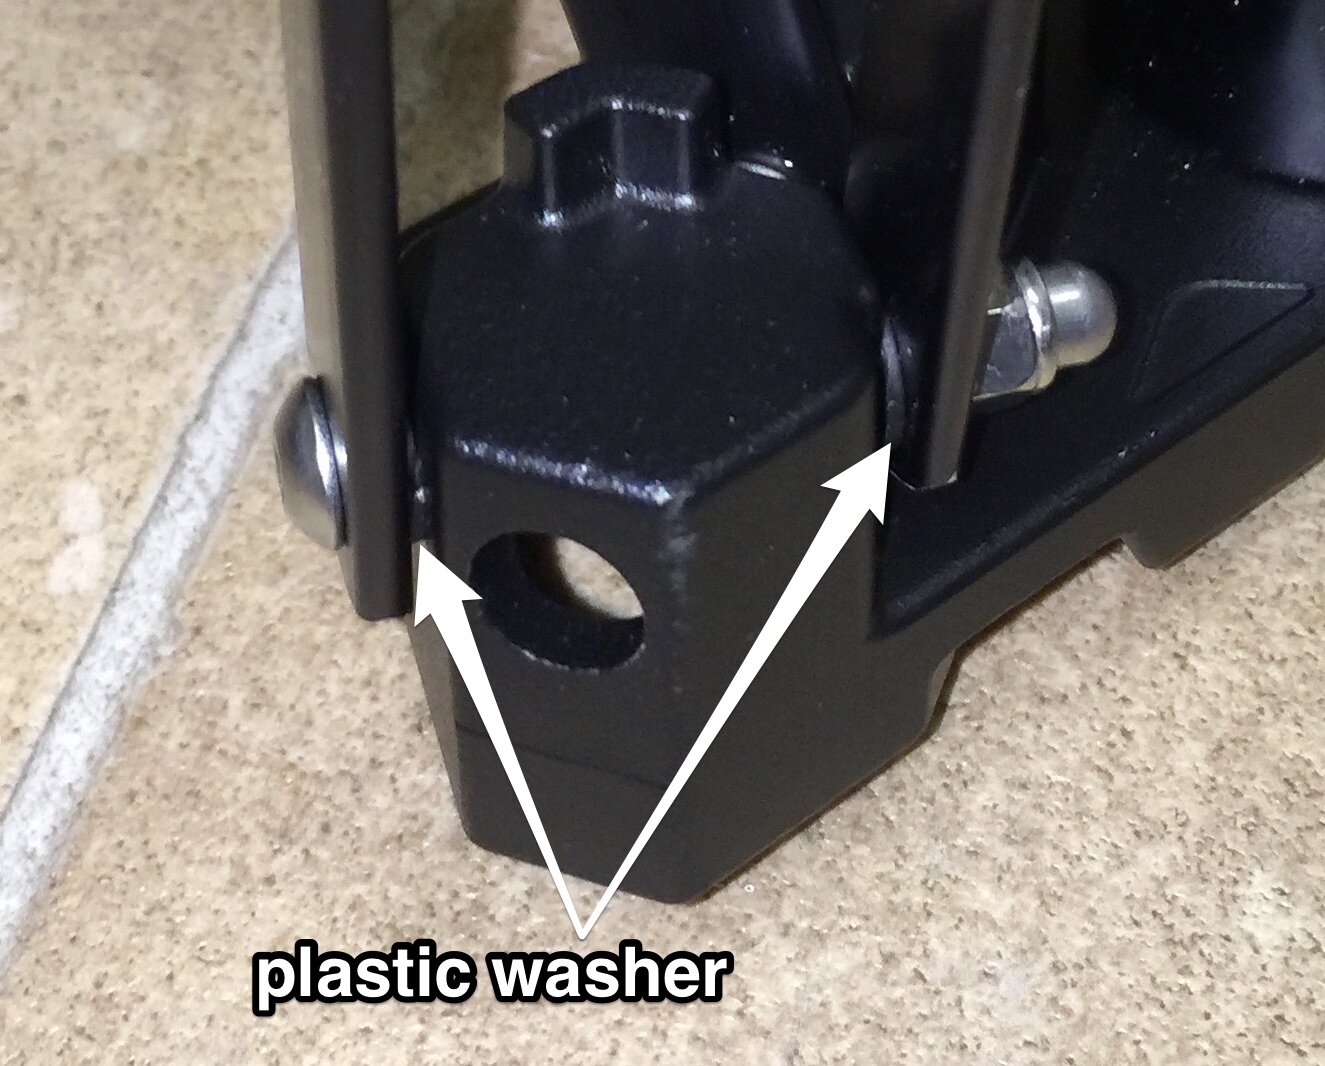
plastic washer placement

There is a specific order in which to attach the spreader strut pieces to the centre column base. This will become obvious if attempted incorrectly.
single leg attached to the sliding collar
Next attach the legs to the sliding collar, plastic washers are not required on these joints.
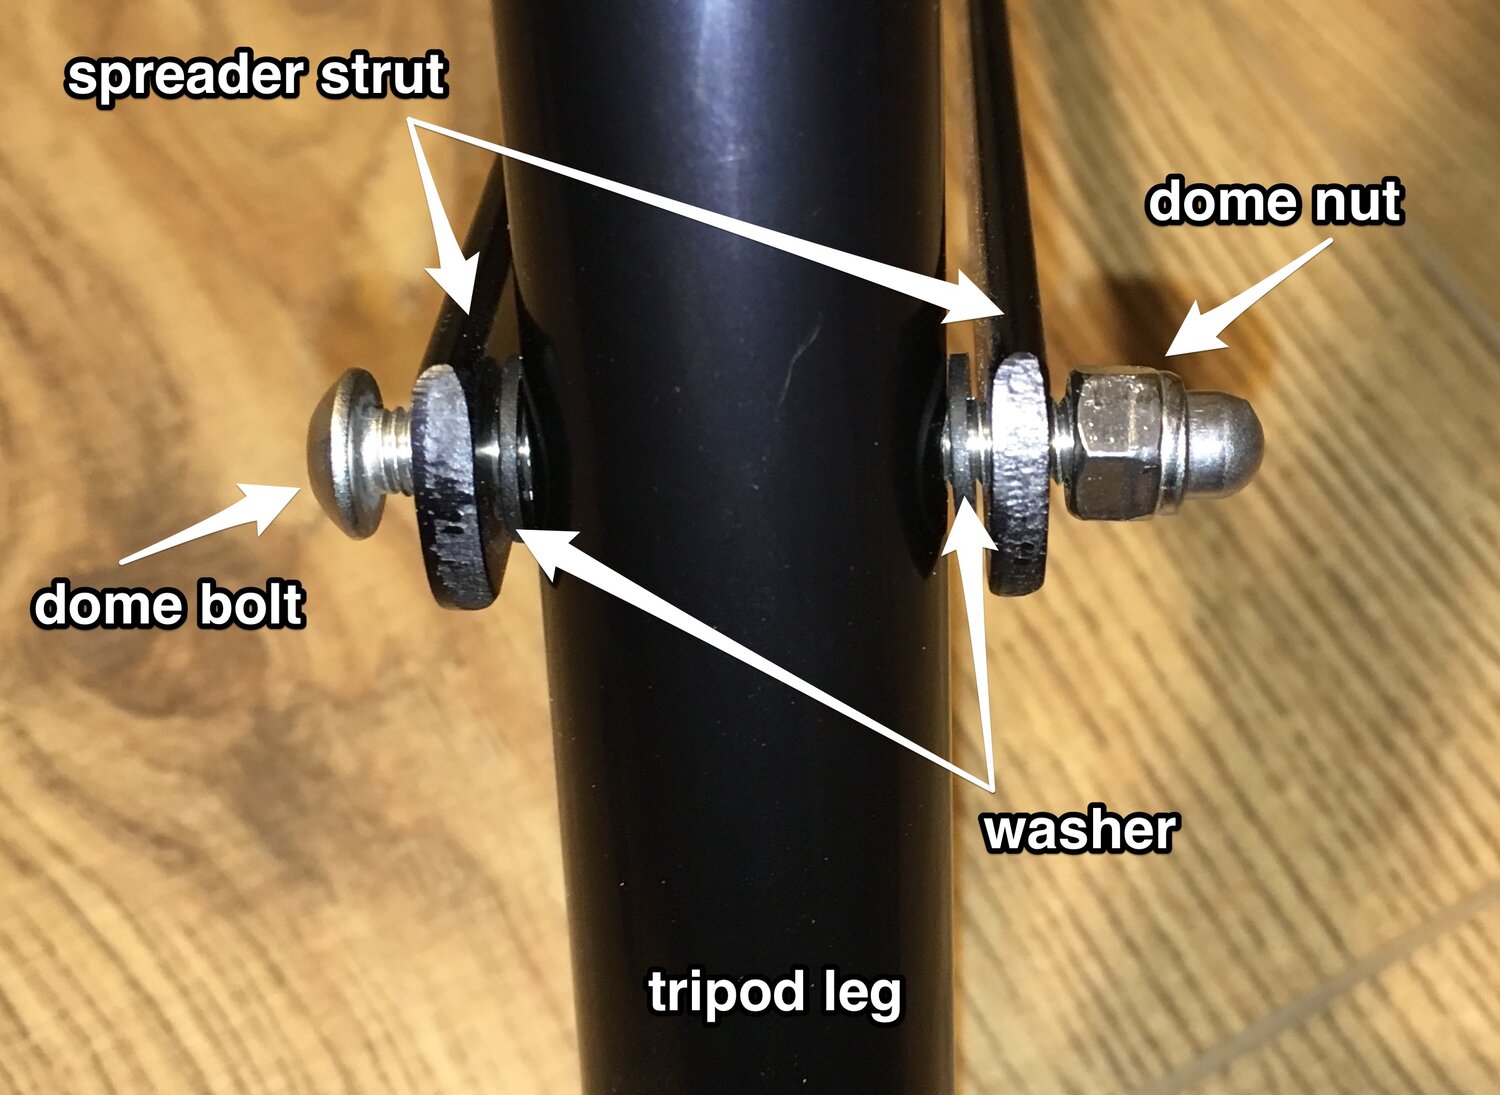
spreader strut and leg assembly, untightened
Push the M5 bolts through the spreader struts and tripod legs along with two plastic washers in this order; Bolt - Spreader - Washer - Leg - Washer - Spreader - Nut.
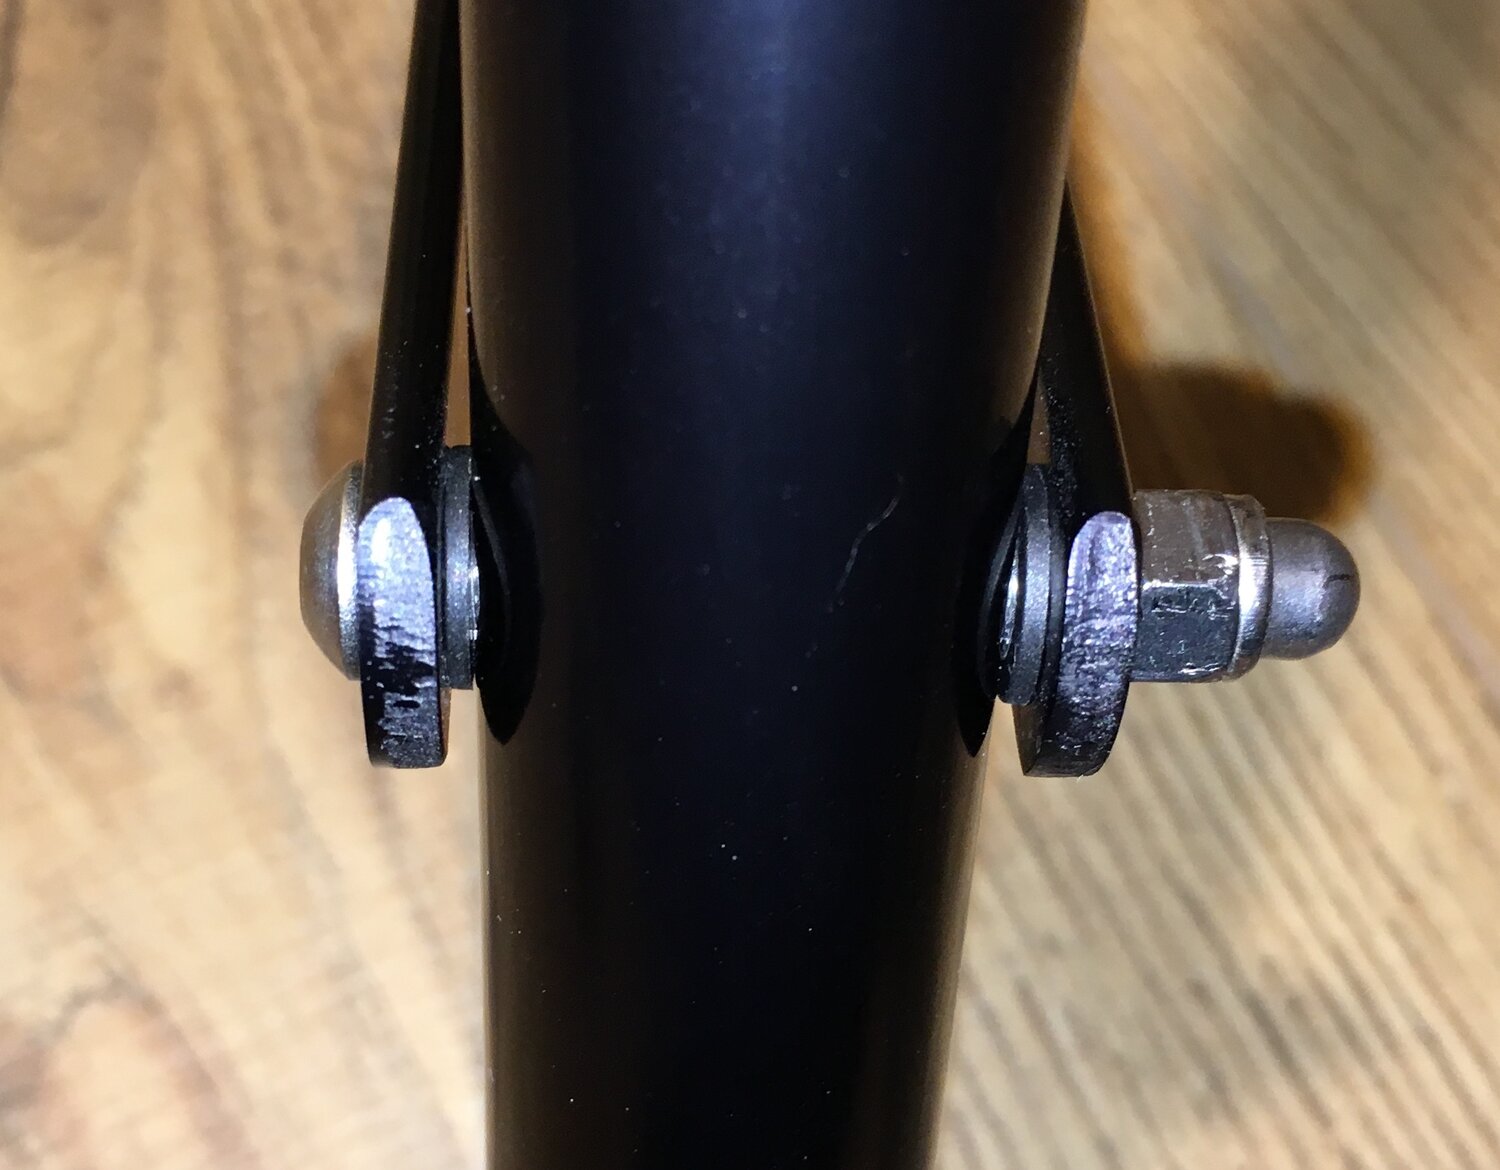
spreader strut and leg joint, tightened
foot rubber assembly
Insert the rubber foot into the end of each tripod leg.
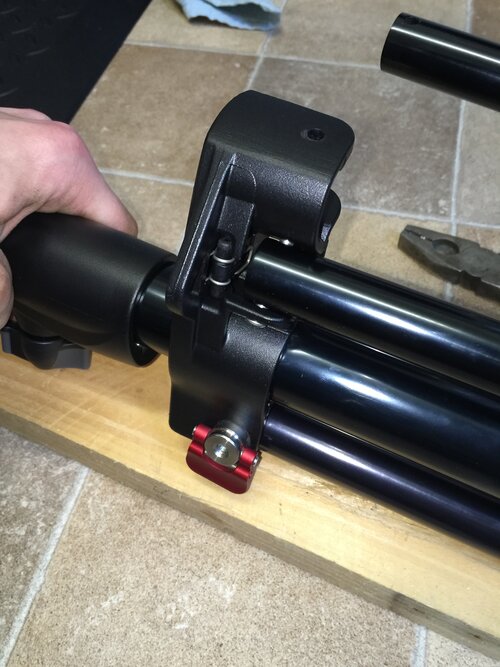
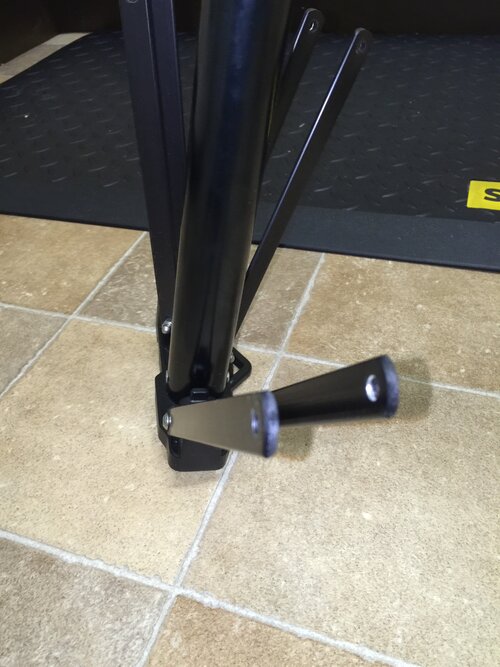
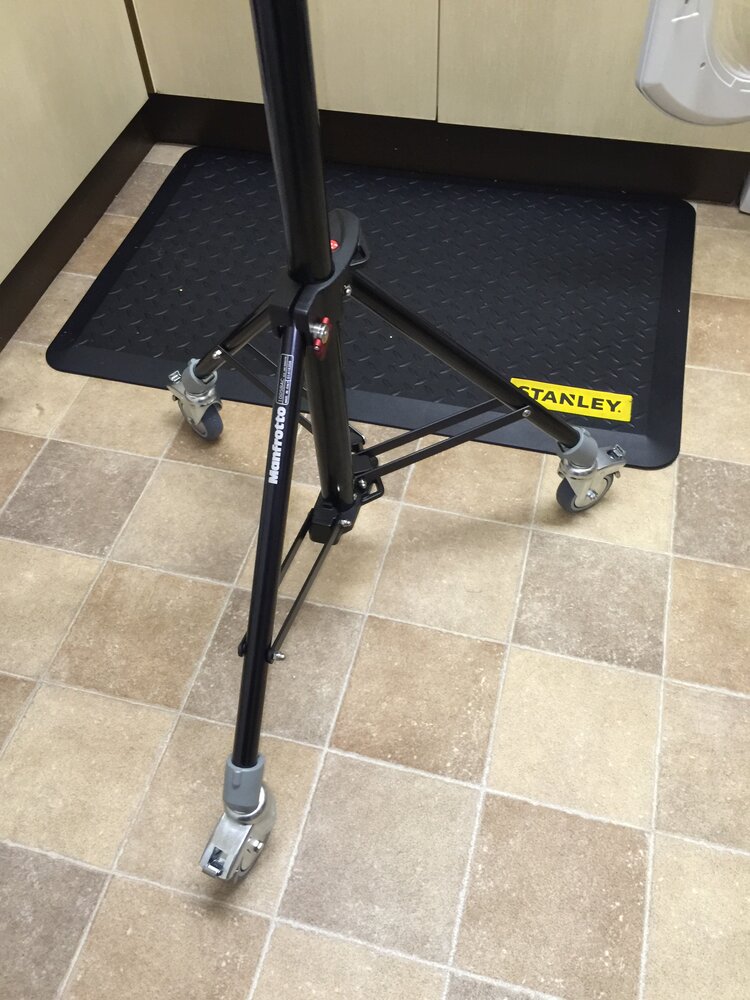
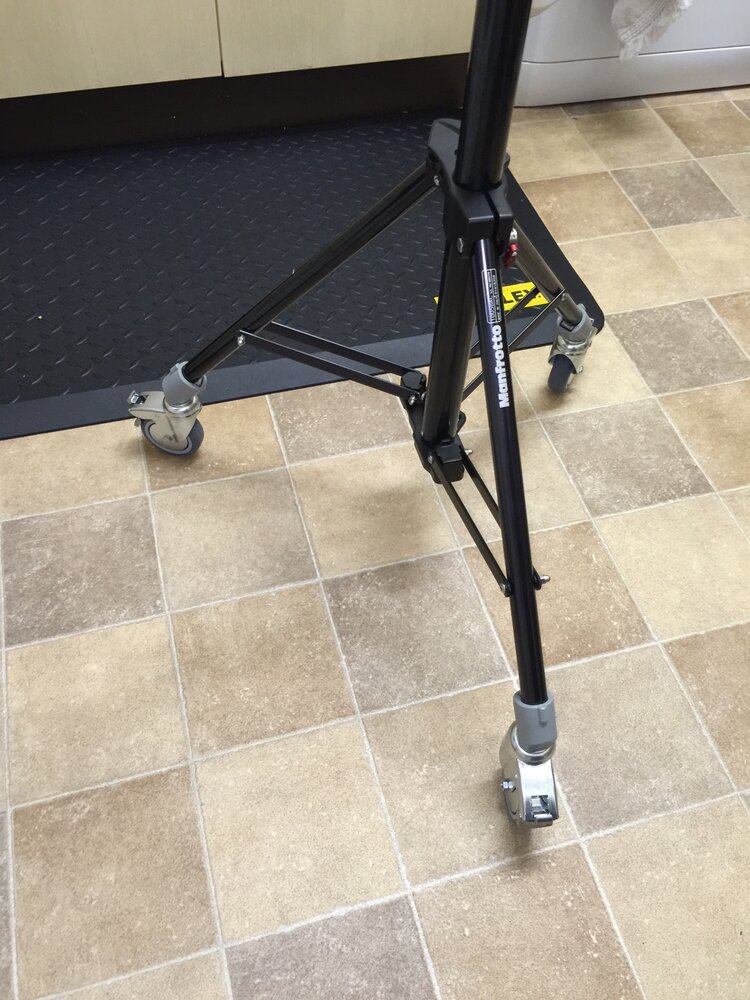
The Wheels
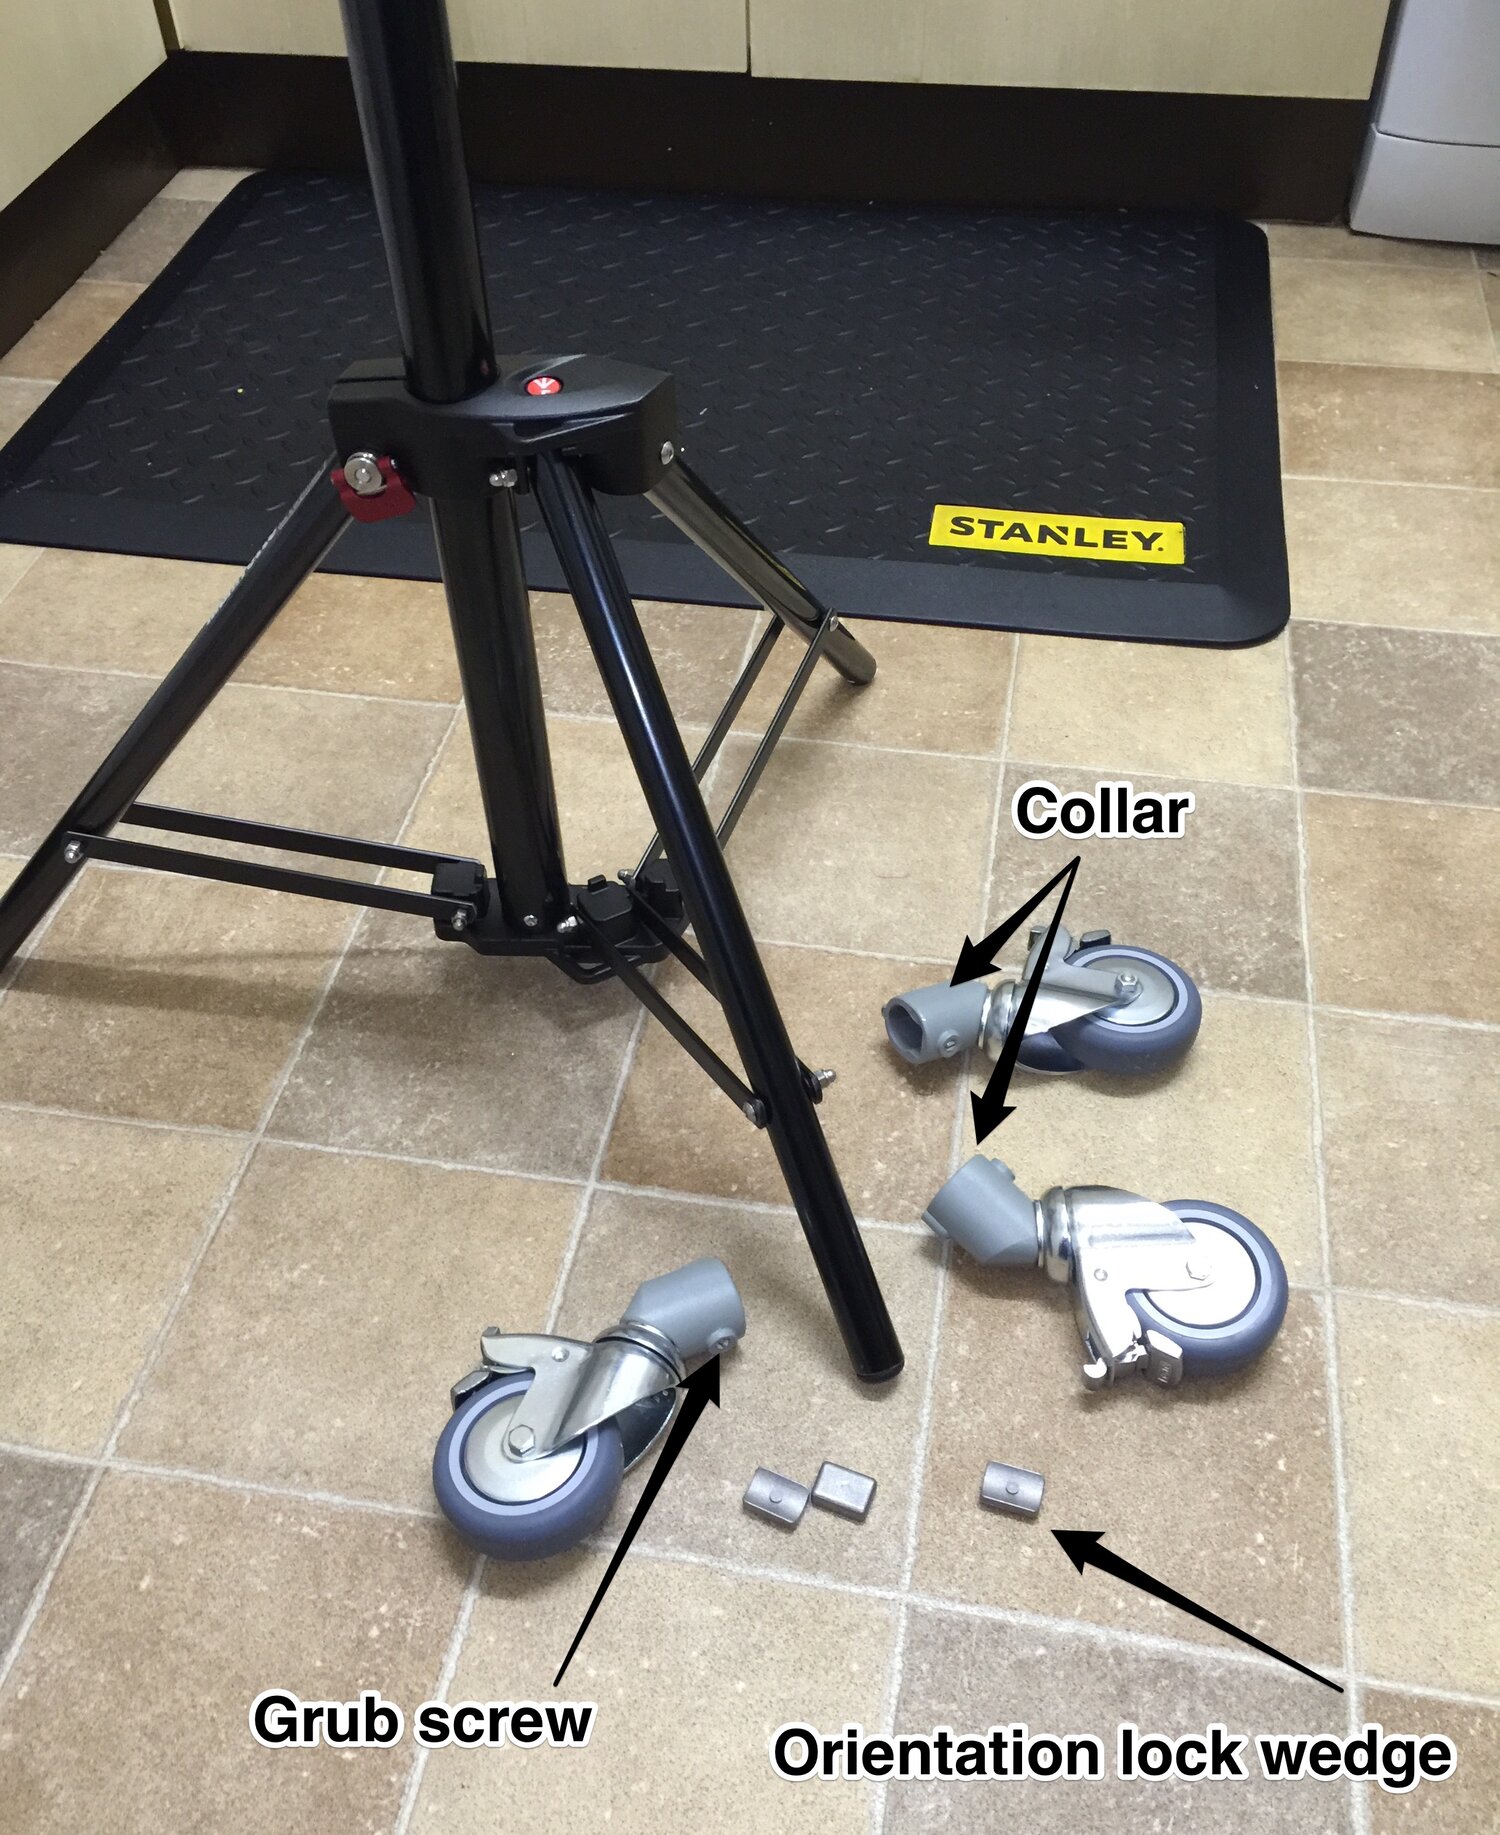
grub screw and orientation lock wedges
These wheels were ordered from Amazon, the orientation lock wedges slot into the single hole at the foot of the leg, the collar of the wheel will slide onto the bottom of the leg. Firmly tighten the grub screw and you should find that you now have an APoS tripod, which glides smoothly and fits effortlessly through doorways.
Summary
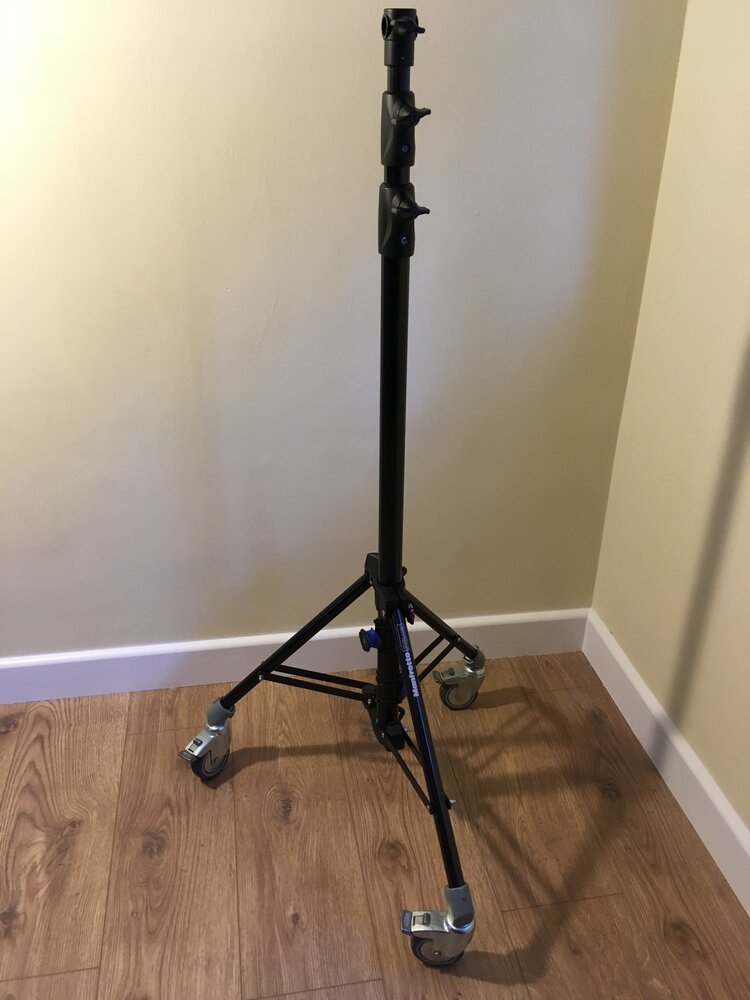
As mentioned in my previous post reduction of the max footprint from 106 cm to 70 cm improves the mobility through doorways at the expense of stability. I have used this rig on numerous projects with a Cisco 3600 series AP without issue.
Further clarification regarding the nuts, bolts and washers
The M5 dome bolts, nuts and plastic washers came from various sellers on eBay.
[ M5 x 40mm ] dome head bolt
A2 Stainless Steel Button Head Screw, Allen Socket Bolts M5
5mm dome head bolt, 40mm in length
[ M5 ] dome nut
A2 Stainless Steel Dome Nuts To Fit Metric Bolts M5
[ M5 ] nylon washer
Metric black nylon plastic washer M5
Nylon plastic washer with bore / centre hole 5mm diameter
Disclaimer
If you decide to follow my guide for the modification of your own tripod that is great, please let me know how it goes. I do not accept any responsibility for damage caused by performing these modifications to your own tripod, damage to property, equipment or injury.
Download Guide
Thank you for your interest!
@nickjvturner